I am amazed it’s been nearly a year since my last post!
It’s not that I haven’t been sewing during this time, I have. For example, there were a couple of months earlier this year when, after watching Sarah’s Veblen’s pants fitting class, I pulled out all my pants patterns and re-traced them in order to create new muslins. (Not a bad idea to do every few years anyway). Per Ms. Veblen’s suggestion, I included horizontal balance lines to help me better fine-tune where my personal length adjustments needed to be in the area between my waist and full hip. These latest pants muslin efforts yielded some unanticipated surprises and useful fitting information when all was said and done. Perhaps I’ll create a future post on this topic at a later time.
On to my most recent project, a reversible quilt.
My original inspiration came from this colorful fabric print I saw on Etsy several months ago:
I also found some coordinating prints from this fabric designer in the same Etsy shop. I then began searching for quilt patterns and found Nicole Moore’s “Turntables” pattern. Her modern take on circles and color gradations seemed just right. Check out Nicole’s blog about her wonderful pattern design:
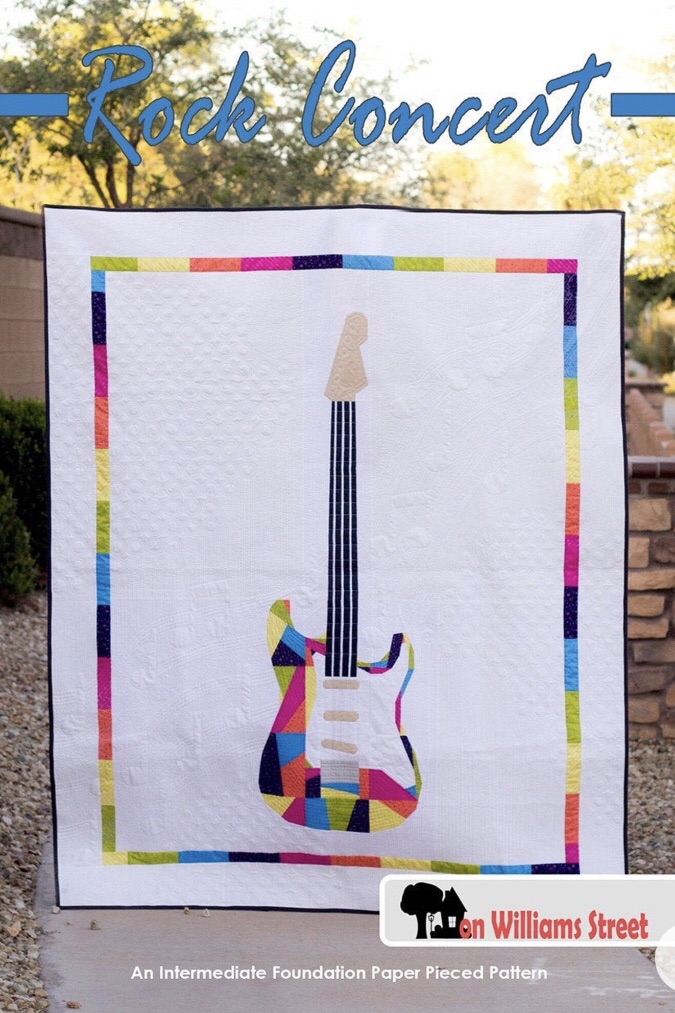
I hadn’t originally planned on making a reversible quilt but during my pattern search I also found this gem from On Williams Street:
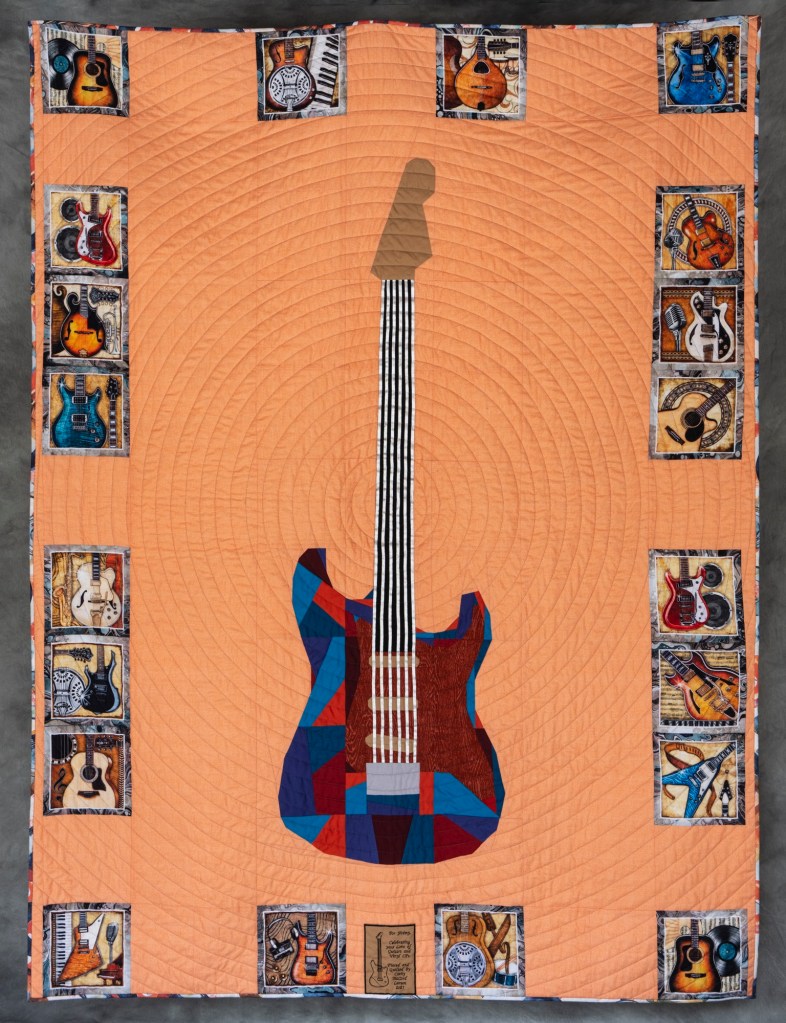
I’d never experimented with paper piecing before but I like learning new skills and loved this particular design. I also liked how the colored section of the body of the guitar resembles a sort of stained glass effect.
Our daughter’s boyfriend also loves guitars. Not only does he play, he also has several instruments in his collection. The “Rock Concert” pattern above further prompted the wheels turning in my creative sphere causing me to ponder, could there be two contrasting yet coordinating sides to this project? Why not?
A couple of days later, I happened upon this cool guitar border print, also on Etsy. More bright colors! Seemed like a win for this project.
For the turntable side, I added a large section to the middle which includes a tone arm detailing the brand of stylus our daughter’s boyfriend has on his turntable. I used my embroidery machine to stitch on the logo for that.
Check out the fun woodgrain fabric I found at a nearby quilt shop!
Once I played around with arranging the coordinating prints, the piecing of this side went amazingly quickly.
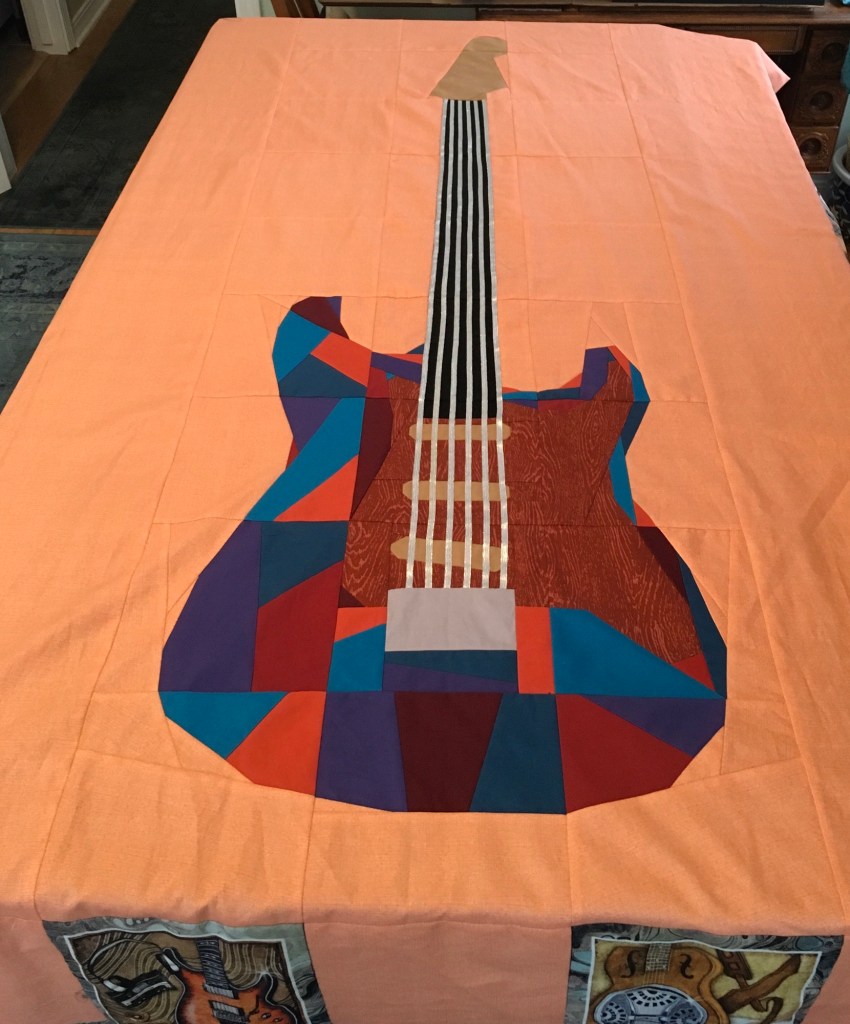
For the guitar side, I found a method of “paper piecing” on YouTube that retains the paper pattern but utilizes a line-scoring, fold and press method instead of sewing on paper (then later tearing away of same). This revised method seemed much less labor-intensive for me so I went in that direction, plus I can re-use the pattern later if desired.
A change I made to the original “Rock Concert” pattern was to stitch 1/4” metallic trim along the guitar neck to create the string detail.
The lengths and widths of each pattern varied slightly so I ended up adding top and bottom sashing to the turntable side and side sashing to the guitar side.
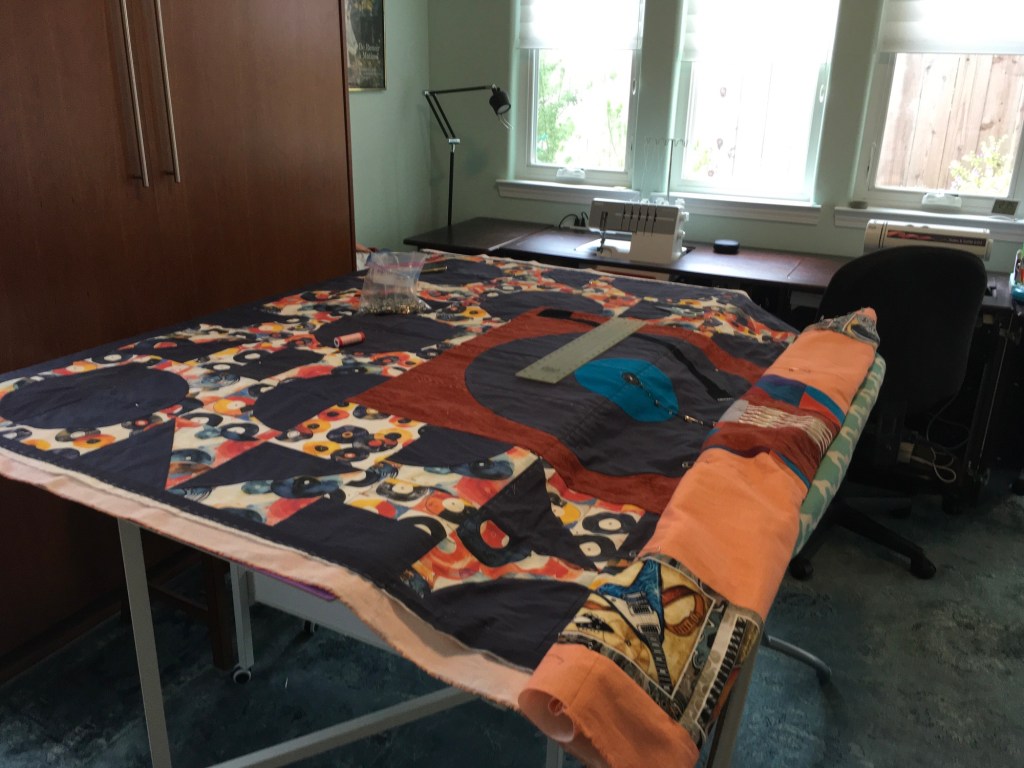
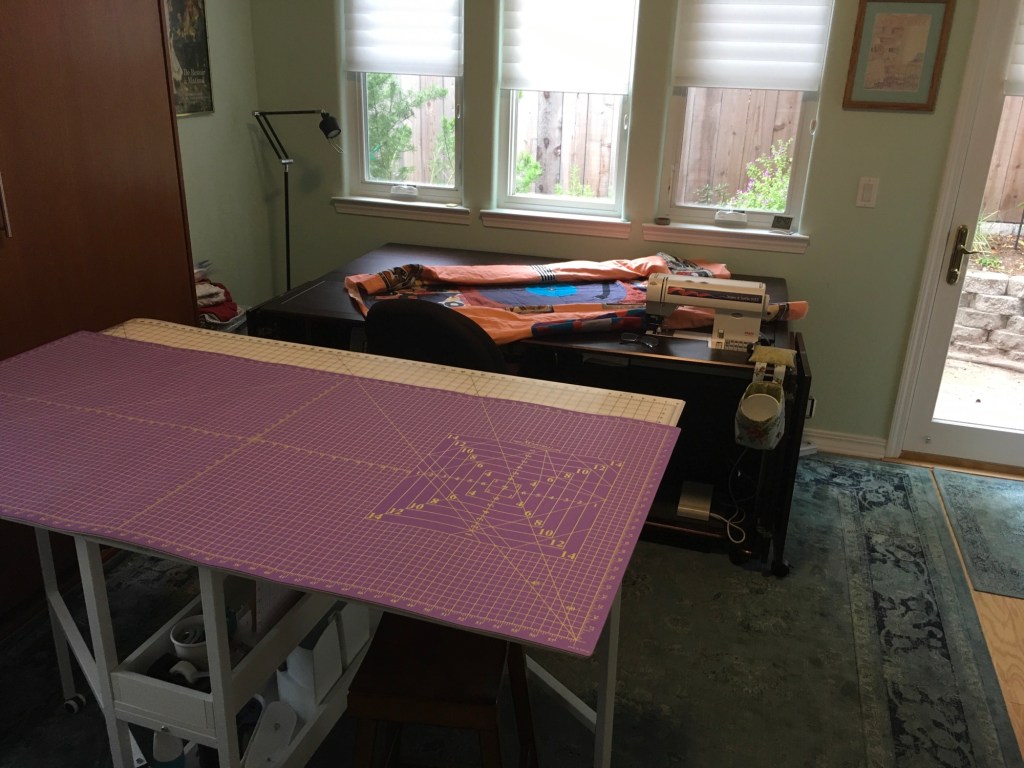
Lining up the centers and sides, basting together prior to quilting.Repositioning my cutting table then utilizing my drop leaf extension on my Koala sewing cabinet helped to manage the weight of the quilt during the machine quilting stage.
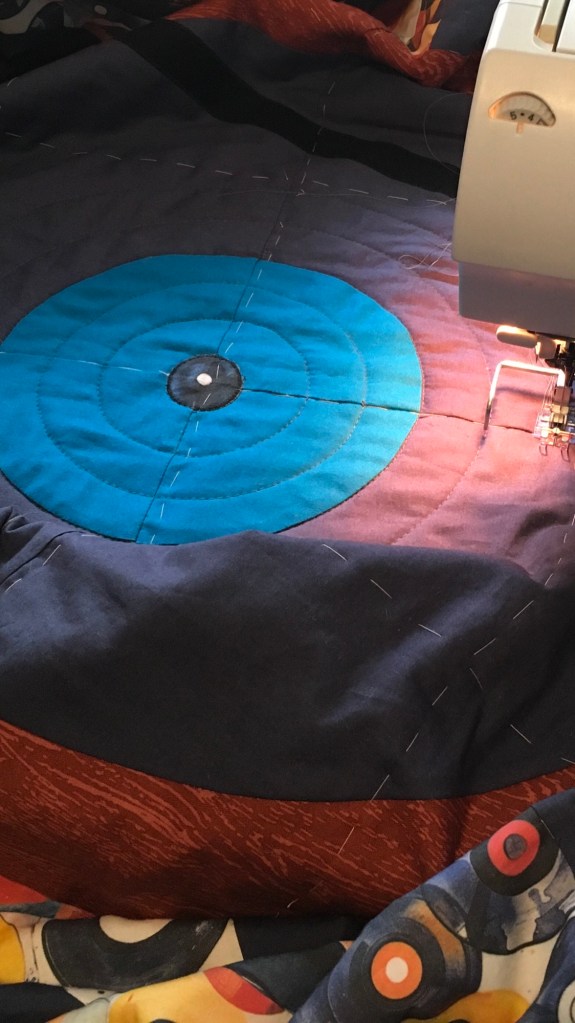
Deciding on a coordinating thread color gave me some pause but I finally landed on charcoal gray shade which worked well. For the actual quilting process, I started in the center, then machine-quilted in circles, using my spacing bar attachment, echoing out approximately one inch from the previous circle and alternating from clockwise to counter-clockwise in direction. The IDT feature (think walking foot) on my trusty Pfaff 6152 workhorse sewing machine proved very effective in keeping the three layers feeding evenly throughout.
The beginning of the echoing circles quilt process. The machine quilting went amazingly fast compared two most recent quilts I made. I was finished in two days.
Finally, choosing a coordinating fabric for the binding that would work well for both sides also gave me pause. The fact that I only had enough of the Manchester LP print to make the binding made the fabric choice decision for me. It ended up being the perfect solution.
Turntable Side (Photo by Walt Andrus)Guitar Side (Photo by Walt Andrus)
Conceptualizing and creating this particular project gave me much joy.
Next up? Perhaps some cozy cool weather pieces to add to my wardrobe. Until the next time…
Upon the recommendation of one of my favorite colleagues and sister couturiers, Cheryl L., I’ve been reading a wonderful and thought-provoking book lately; The Point of the Needle, Why Sewing Matters, by Barbara Burman.
In her “A Material World” chapter, page 83, she writes about what many of us who sew things call our fabric “stash”. “Home sewers often keep quantities of unused fabric at home but rarely refer to this treasure trove of fabrics-in-waiting as a ‘reserve’, ‘store’, let alone a ‘library’. Instead, they mostly use the word ‘hoard’ or ‘stash’ to describe this precious resource, hinting at an addiction or illicit concealed bounty.”
In all the fifty-plus years I’ve been sewing, I haven’t really questioned this fabric storage label but as I read Ms. Burman’s thoughts and revelations on the subject, I’m wondering if viewing one’s curated fabric collection as a “stash” somehow promotes a secretive and guilt-inducing sense of indulgence. Maybe it’s a fun, tongue-in-cheek kind of description, but is this really a healthy and respectful way of viewing the supplies and tools of one’s chosen craft? Even if this is our hobby? I wonder. Would the same description be made of the unused lumber or an exotic wood collection for a woodworker? Or the paints collected by amateur artists?
While I can relate to the idea of perhaps having more fabric than I can or will use in this lifetime, I’m kind of done feeling guilty about it or playing into the mindset that my fabric collection is some sort of secretive indulgence, the quantity of which I should conceal, apologize for or feel embarrassed about. Maybe I’m missing the sense of fun and community, but for me, a shift in labeling mindset (not referring to my acquired fabric as a “stash”) has yielded not only as sense of joy and pleasure in the practice of collecting and “curating” fabric but also a measure of respect for what I’ve chosen to have in my home.
I’ve personally found great value in a periodical reassessment of what precious textiles I have on hand, maybe every one to two years, similar to the practice of going through one’s wardrobes after each season. For me, this fabric assessment activity has proven liberating and though a tad painful at times, ultimately yields a feeling that a weight has been lifted.
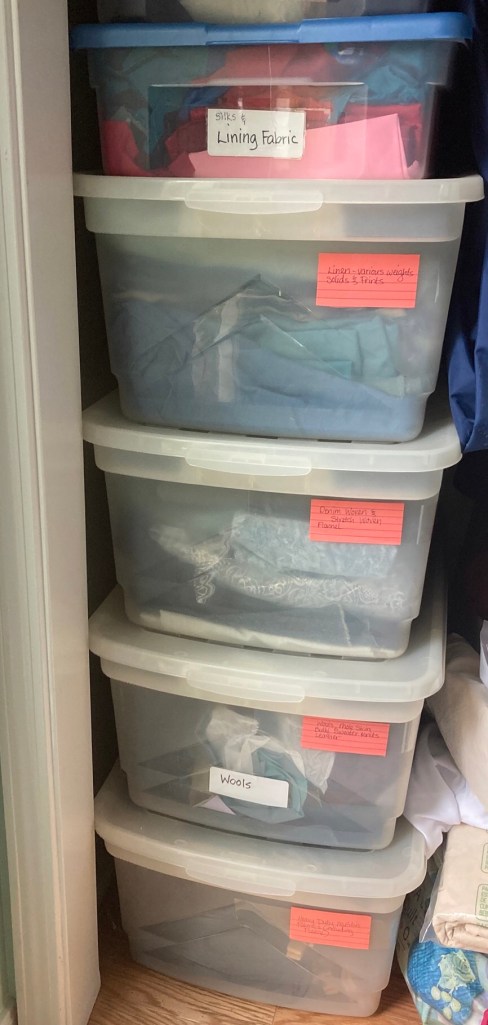
Many of us have made impressive and inspiring strides in categorizing, and organizing our fabric supplies by color, fiber content and lengths, especially my quilting friends. I’ve begun doing this myself, and what started off feeling like a chore at the beginning ended up yielding delightful surprises of uncovering forgotten pieces and new project inspiration.
I also tend to sew fabric that I’ve most recently acquired, so going through what I already have proves useful in reminding myself what I’ve previously invested in; “oh yeah, I already have a beautiful piece of taupe linen for those pants I wanted to make”. To help with the process, a really fun new “tool” I’ve started using with each new piece I buy is Fabric ID tape. Thanks to the folks at myconfidentstitch.com for stocking this handy product.
Looking forward to making a Fall shirt with this soon.
Going through my fabric collection every year or so has proven a good opportunity to assess what I’ve grown out of regarding my personal taste, what seems dated or includes colors that no longer speak to me. I haven’t tried it myself but one might apply the Marie Kondo approach, asking if each piece of fabric continues to “spark joy”.
For the fabric I’ve decided needs to go to a new home, I found the following donation reference guide in the U.S.:
My friend Gale, an avid quilter, recently shared a resource of where to purchase pre-owned, unused fabric; estate fabric sales.
In connection with my most recent review of what fabric I have on hand, or “shopping my stash” as referred to by some, I’ve started using a fun app on my iPad, “Freeform”. I’m really enjoying the visual aspect of it, similar to the benefits of creating boards on sites like Pinterest.
Here is a sample page I created from last Fall:
Regardless of what we choose to call our respective fabric collections, may those of us who enjoy making things with the variety of precious textiles we have available to us in our world, do so with love, respect, pleasure, meaning and a deep sense of satisfaction in the years to come.
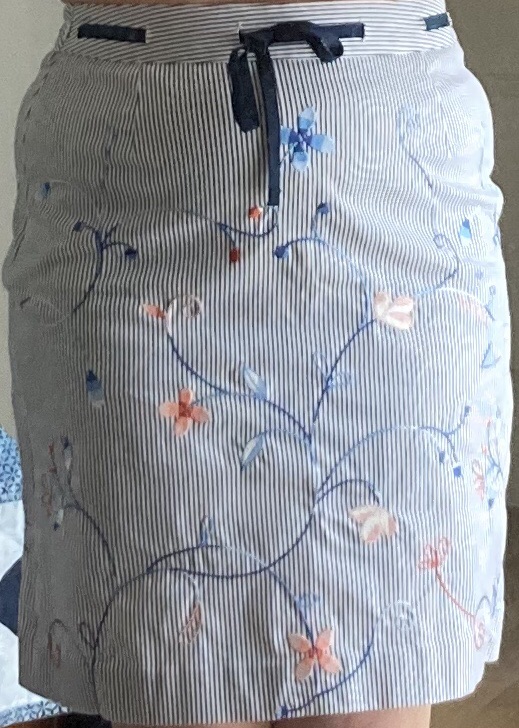
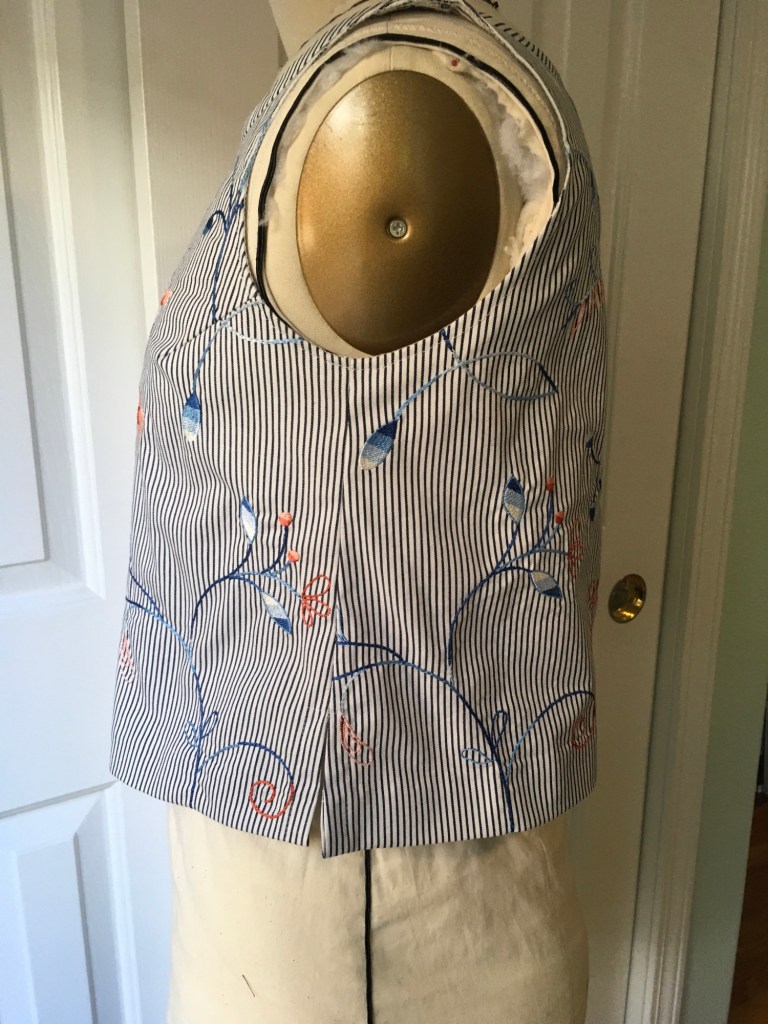
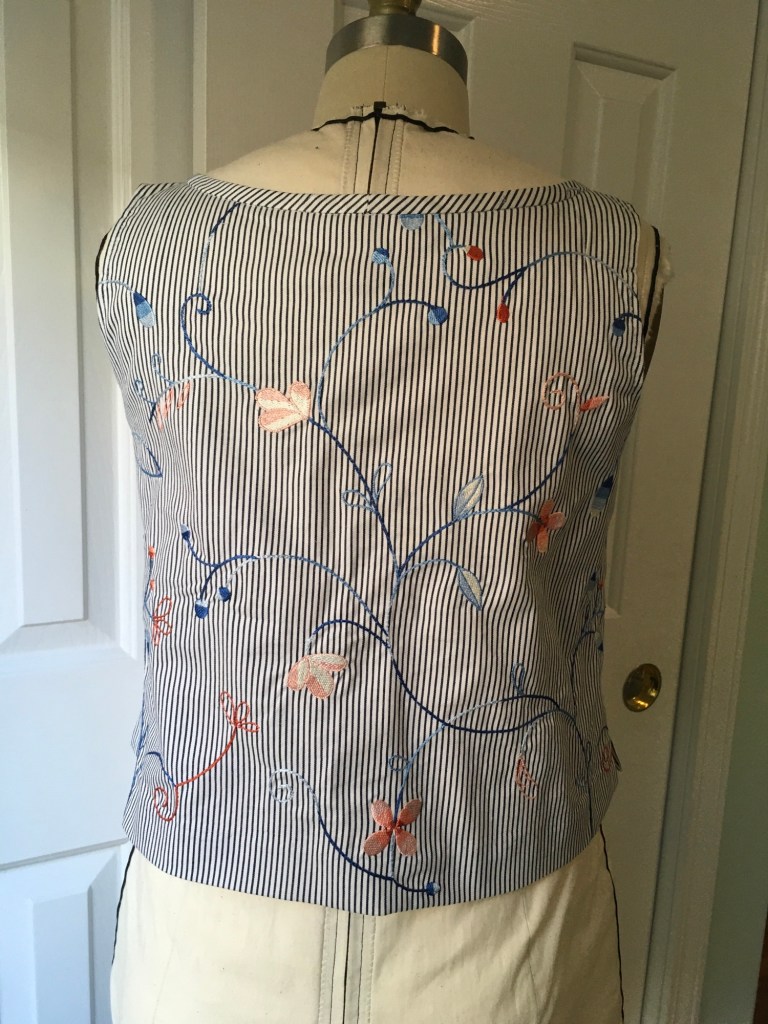
I loved the embroidered stripe fabric on this Talbots skirt I found secondhand on ThredUP so much. Even though the skirt zipped up fine and the fabric content had 3% elastane in it, the fit was still a bit snug. So in my closet it sat for months and I never wore it.
Original skirt
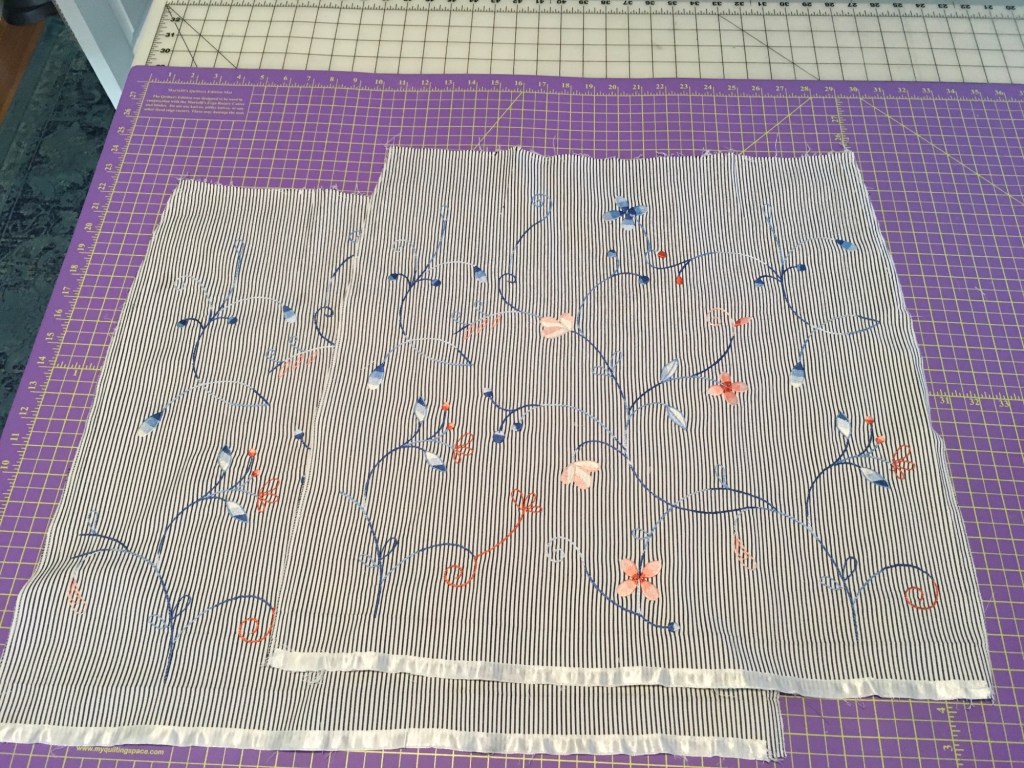
Rather than sell or donate it I decided to use the skirt fabric to make something new that I actually would wear. I decided on a sleeveless summer top. Then it was time to choose a suitable pattern.
Newly harvested upcycled fabric
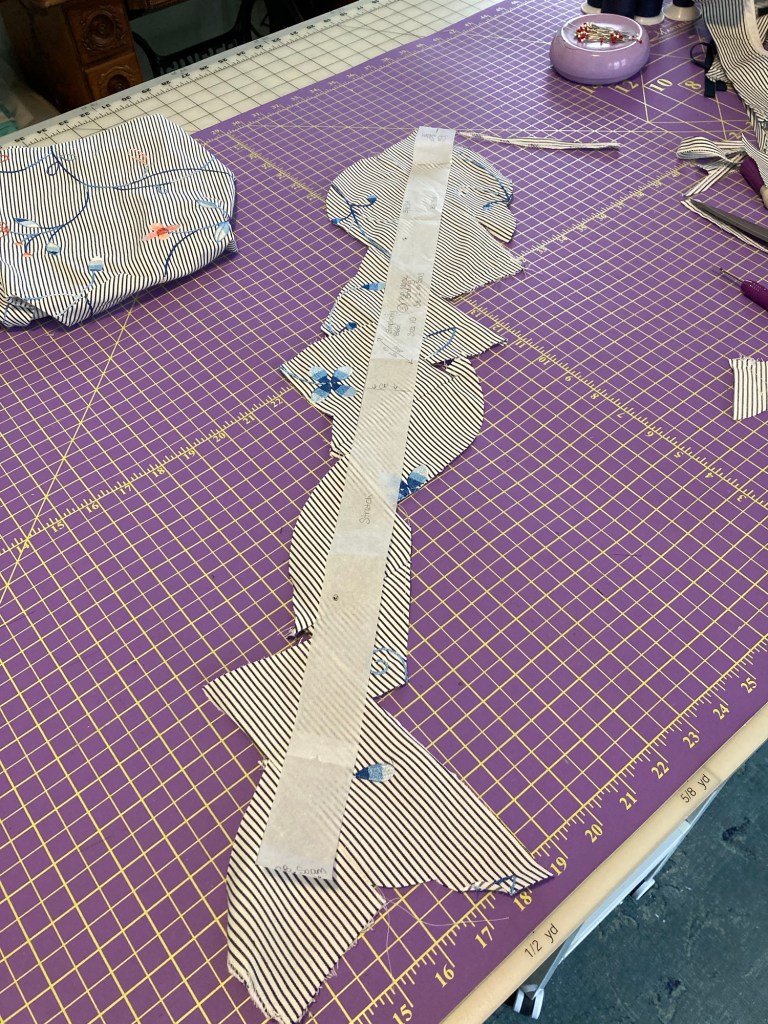
The simplest option was a tried and true, if somewhat boxy tank I’ve made several times before; Simpliciy 8661.
I have a couple more tank top patterns I might have used but this one fit the yardage I had to work with the best.
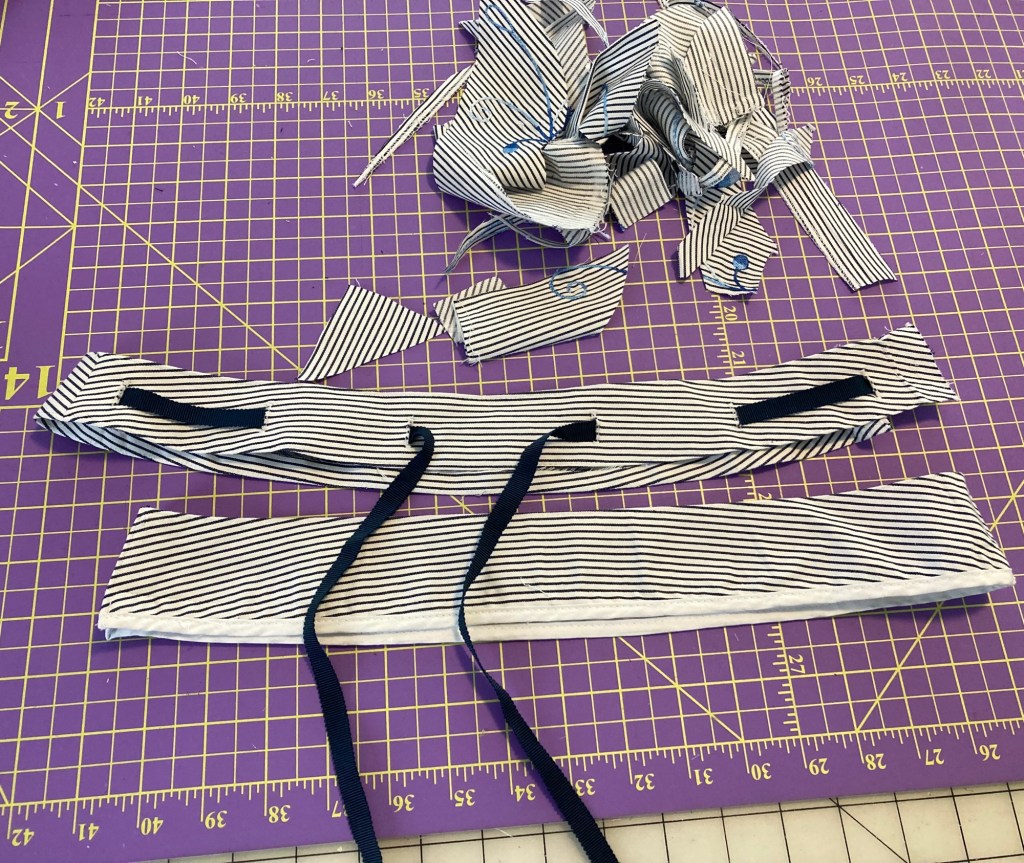
Everything came together quite easily but when it came to creating the bias neck and armhole bindings, I came up short on fabric. My workaround was to serge, turn under and topstitch the armholes and create the bias neck edge binding from pieced fabric scraps.
A bit of a puzzle to figure out but I managed to make it work. Remaining fabric scraps
Here is my new sleeveless top. It’s comfortable, versatile and I am confident I’ll get much more use out of it that it’s previous life as a skirt.
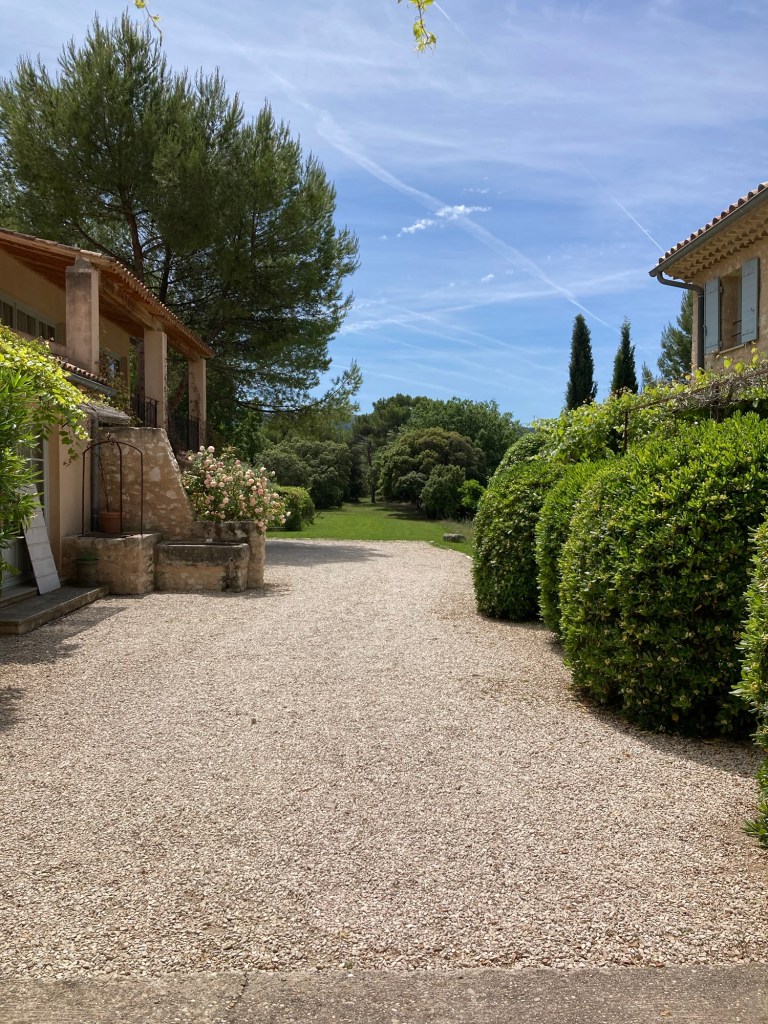
Greetings from the U.S. once again. It’s been a little over a week since returning home from Provence and I’m still feeling the restorative benefits of our life-altering week there.
Even though I wasn’t one of the Plein air workshop participants, it was very enjoyable to see all of their paintings shared at the end of each day. They painted the surrounding verdant landscapes, historical towns with interesting architecture and narrow cobblestone roads, sweeping vistas from hilltop vantage points, vineyards, poppy fields and the gardens surrounding the centuries old manor houses where we were staying.
Though breathtakingly beautiful scenes prevailed with each passing day, it didn’t seem like the painters had much of a vacation that week, working in two sessions and averaging around 5 1/2-6 hours daily. Even on the one rainy day we had they were not to be deterred, painting inside and working on still life studies or observing their teacher painting various objects or flowers. After the full days and our amazing family style meals together each evening, I noted everyone tended to want to make an early night of it.
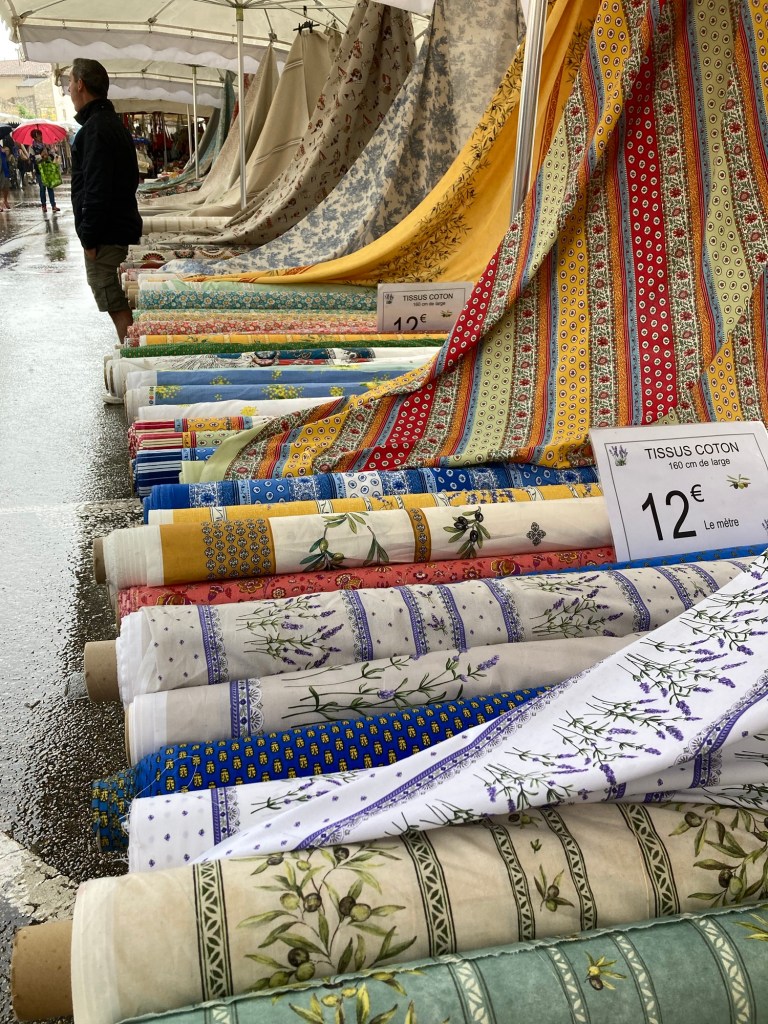
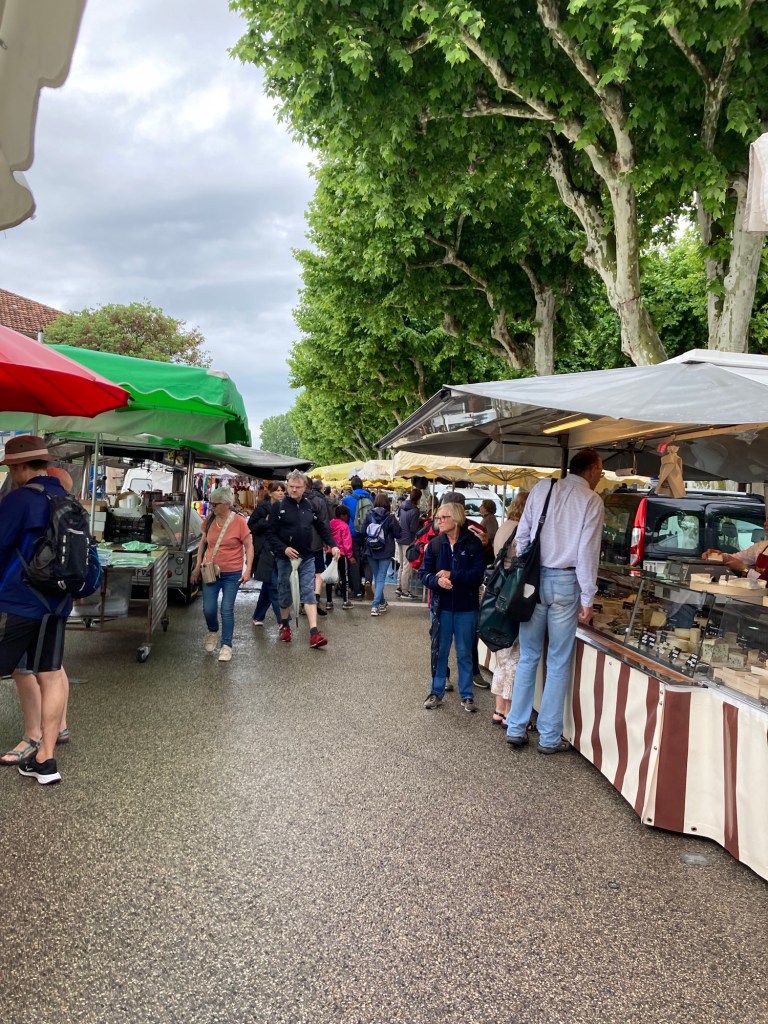
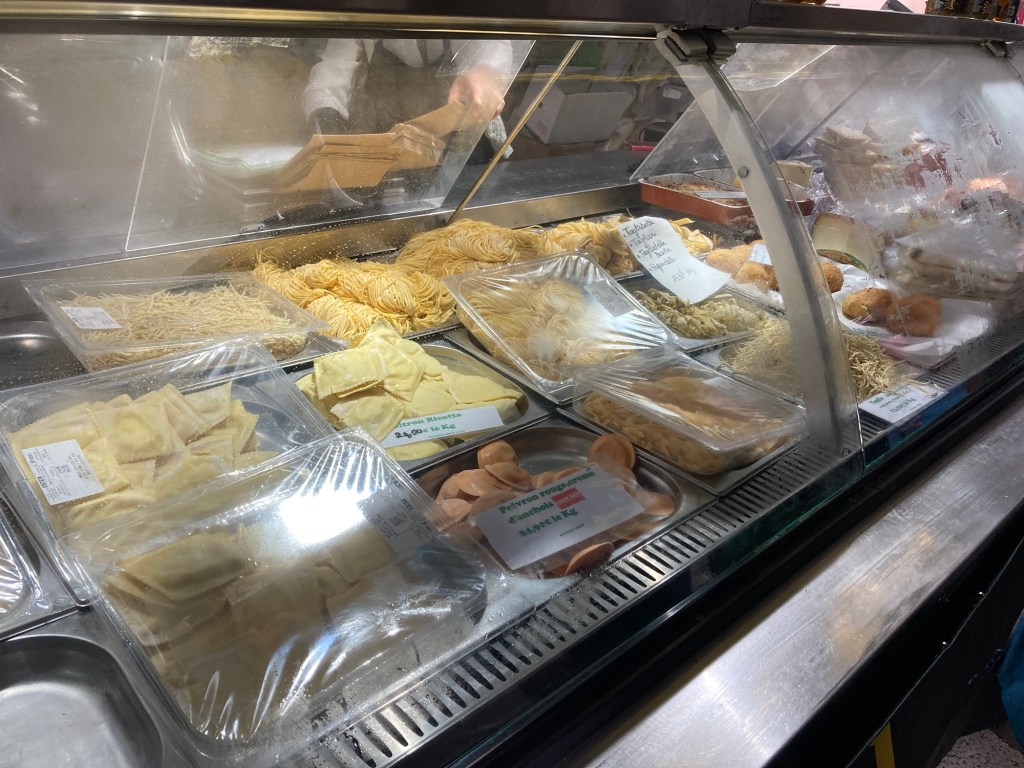
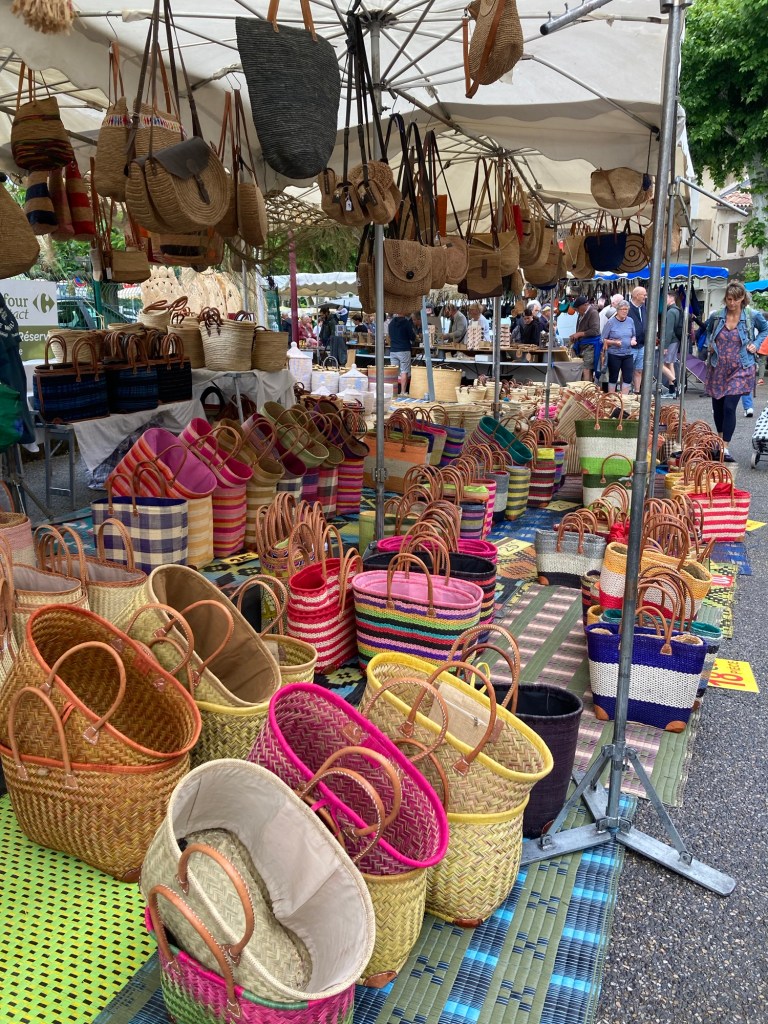
Speaking of that one rainy day, a group of us made a sojourn to the town of Bédoin where a massive street market was underway. Tents were up and the vendors were ready for business. The prices were very reasonable and everyone was very friendly and accommodating. I loved seeing the different fabrics and local artisans selling a variety of hand-crafted pieces, clothing and of course a cornucopia of different fruits, vegetables, cheeses, pasta, bread and pastries.
Here are some photos from that day.
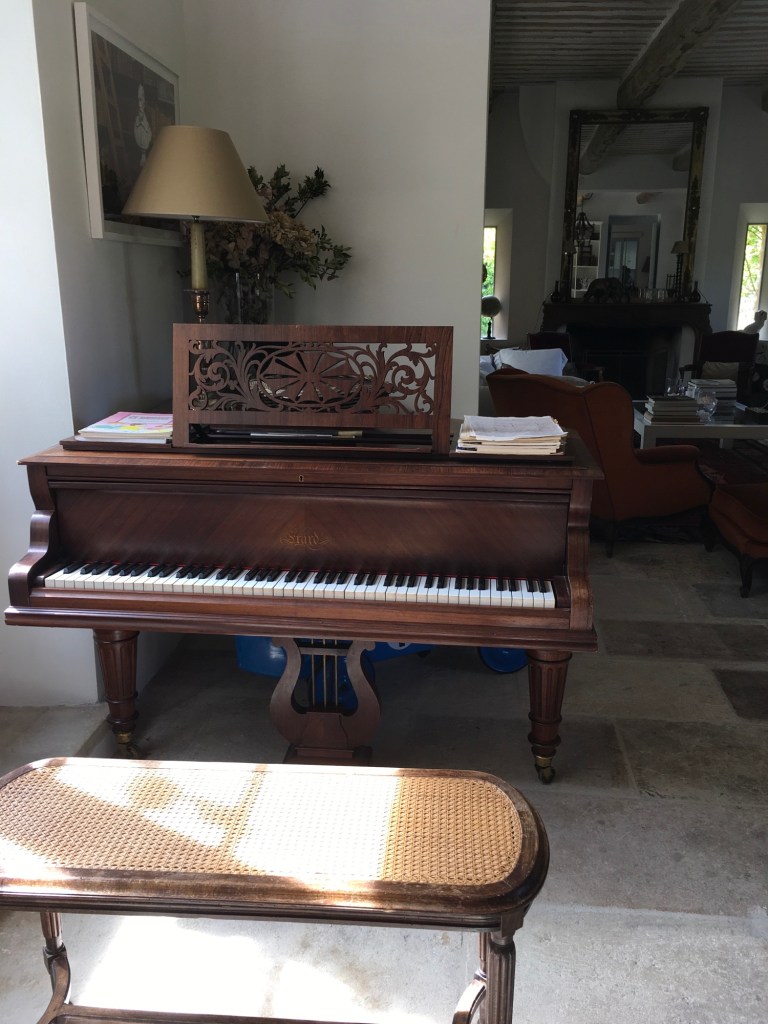
When the painters were off painting, I relished the chance to practice singing, read a novel and take things at a much slower pace in general. I also made it my personal quest to take advantage of the nearby lap pool on the property where I swam almost every day. The pool was unheated so it took some fortitude, acclimating to the cool water at the beginning of each swim, but I’m happy to report I prevailed!
The lap pool. Check out the color of that sky!!!
For me, our week in Provence felt a lot like a wellness retreat. In addition to swimming, I was even able to join in with a couple of my normal Zoom yoga classes with my teacher from the U.S. Our classes usually meet via Zoom at 6:30 a.m on the West coast where I live. With the time difference it was 3:30 p.m. in France so participating in class ended up working well, though somewhat amazing to contemplate and experience in real time. As long as the wi-fi band-width remained strong I was able to make it work.
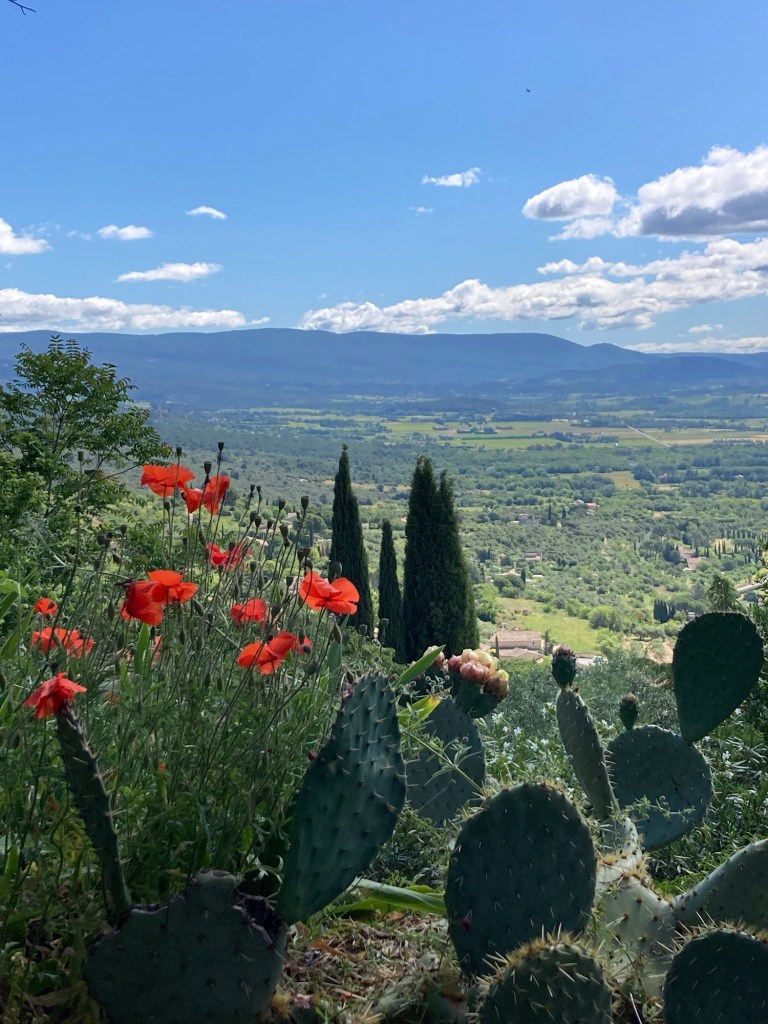
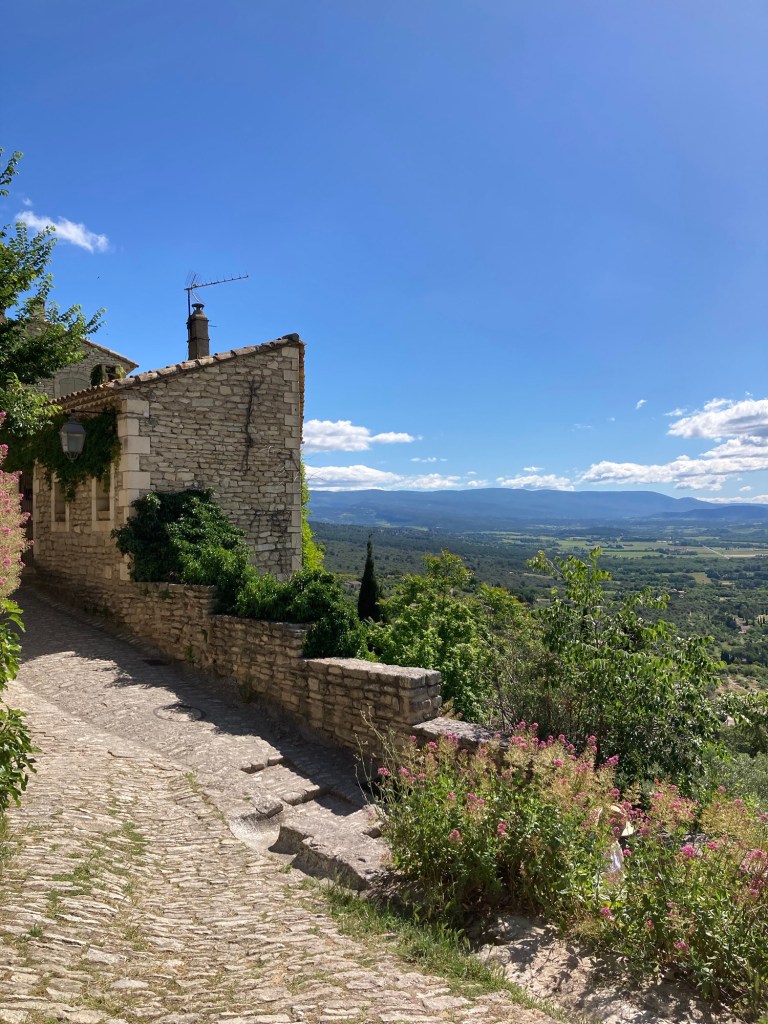
The morning of our last full day in Provence, I traveled with the painters to the ancient hilltop town of Gordes. The wind was fierce that day and proved challenging for all involved, but crystal clear views from the high vantage points were breathtaking to behold.
Here are some of the marvels of that day.
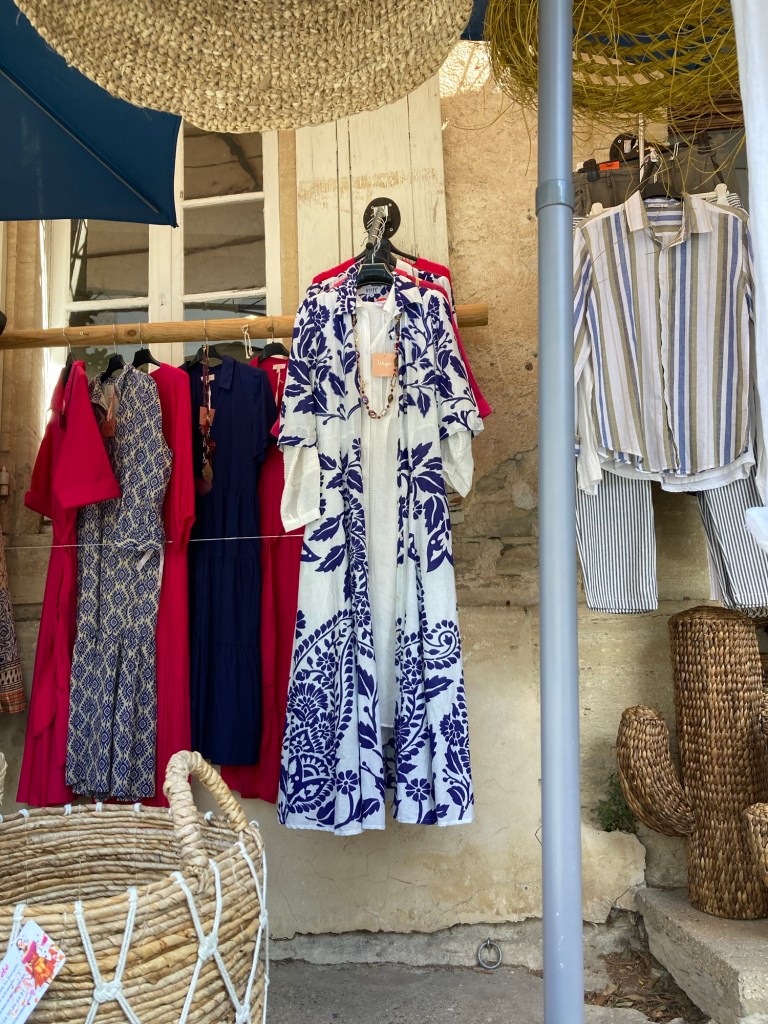
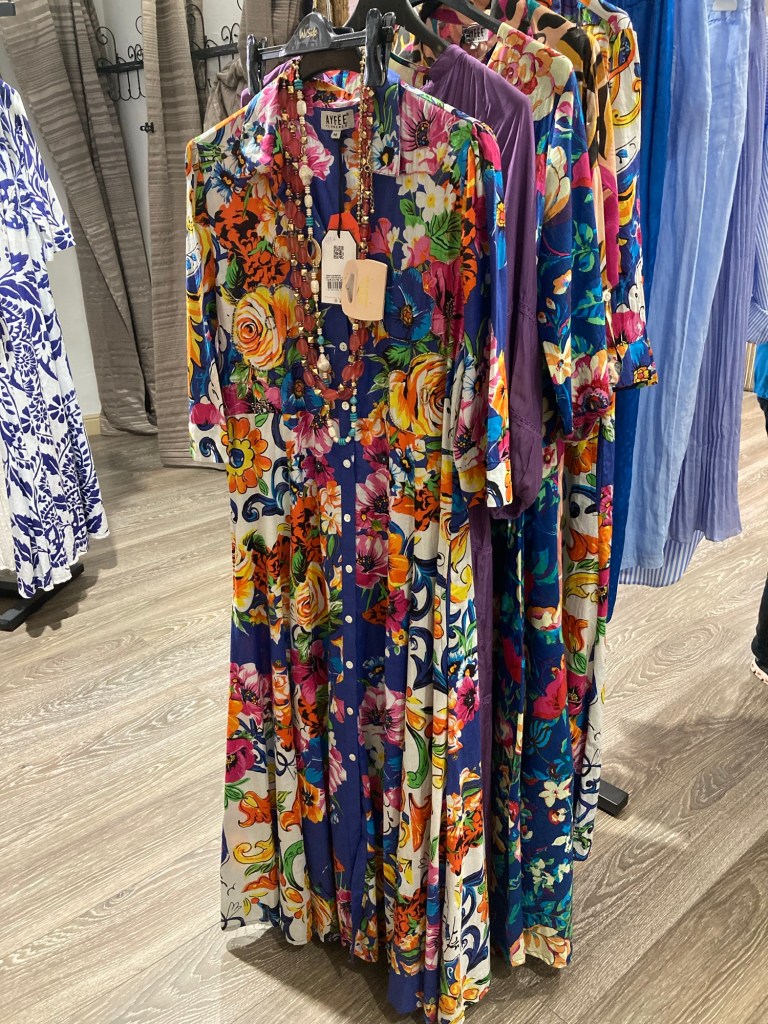
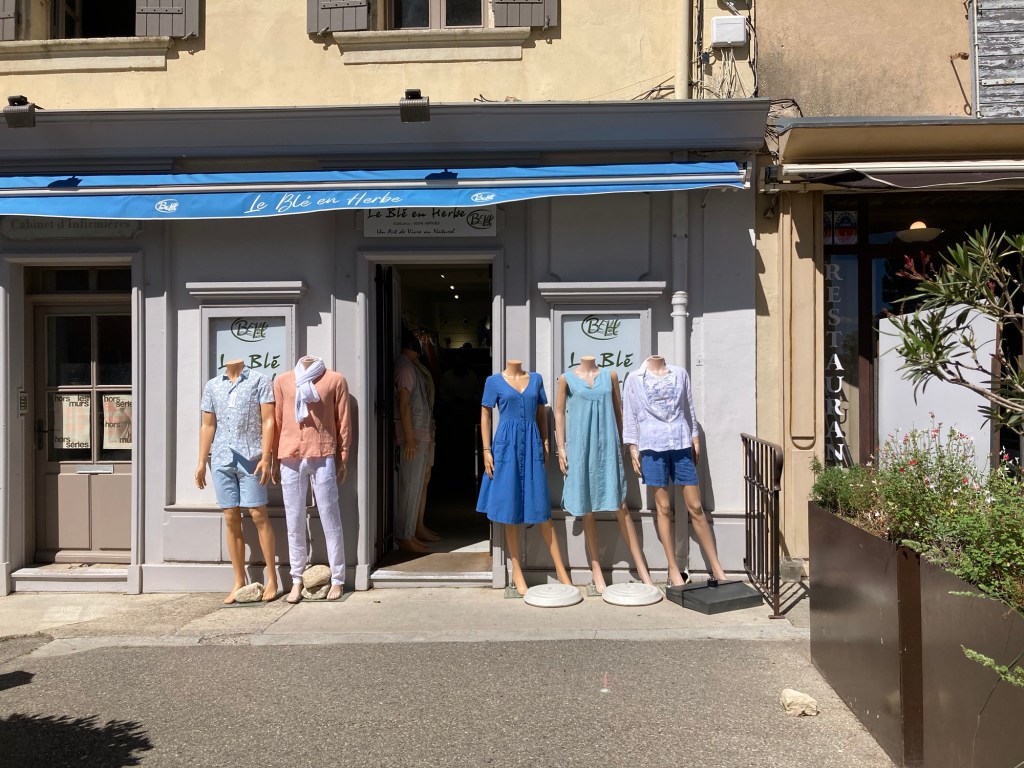
Of course being a seamstress/sewist/maker or “couturier” as one French woman told me I was, it was great fun for me to explore the nearby shops including a clothing boutique with the most colorful collection of dresses and accessories.
Another clothing shop in town. More bright colors.
Inspiring!
Until the next time….
Enjoying some local Provençal folk music at the end of a very memorable week.
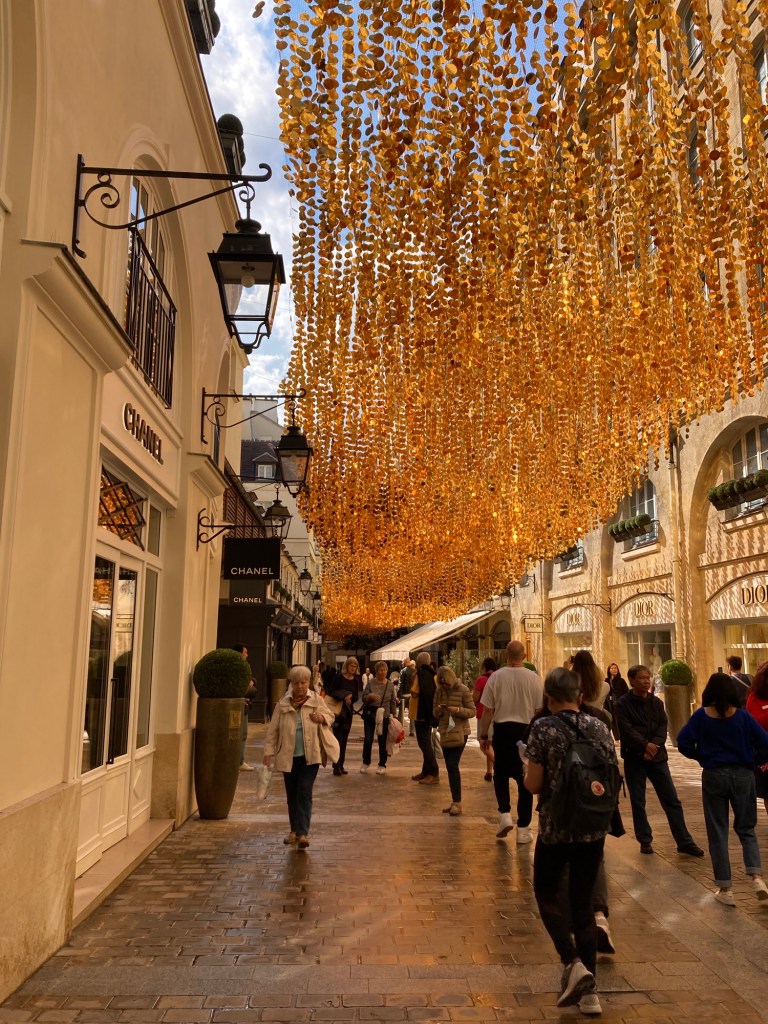
Greetings from wonderful France. It’s so good to be back. I’ve never experienced Paris in late May before. Different flowers are in bloom right now and even though it’s raining more than the last time I was here (October 2017) I’m noticing that people are wearing fewer coats and more flowing skirts and dresses as the weather gets warmer with each passing week.
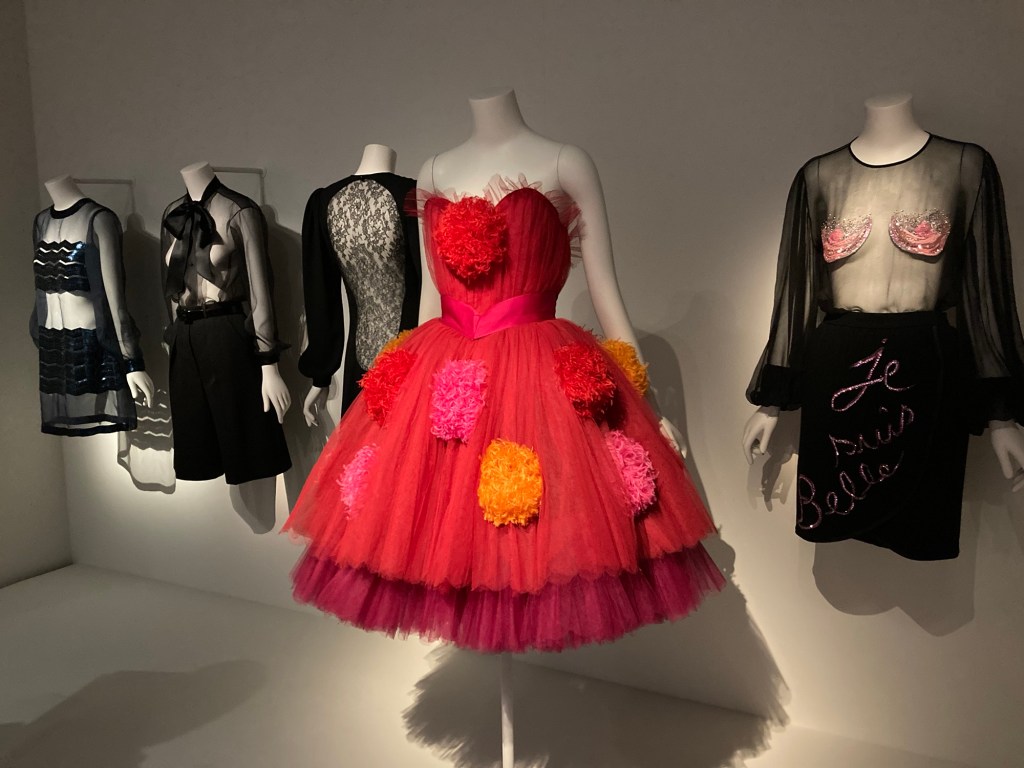
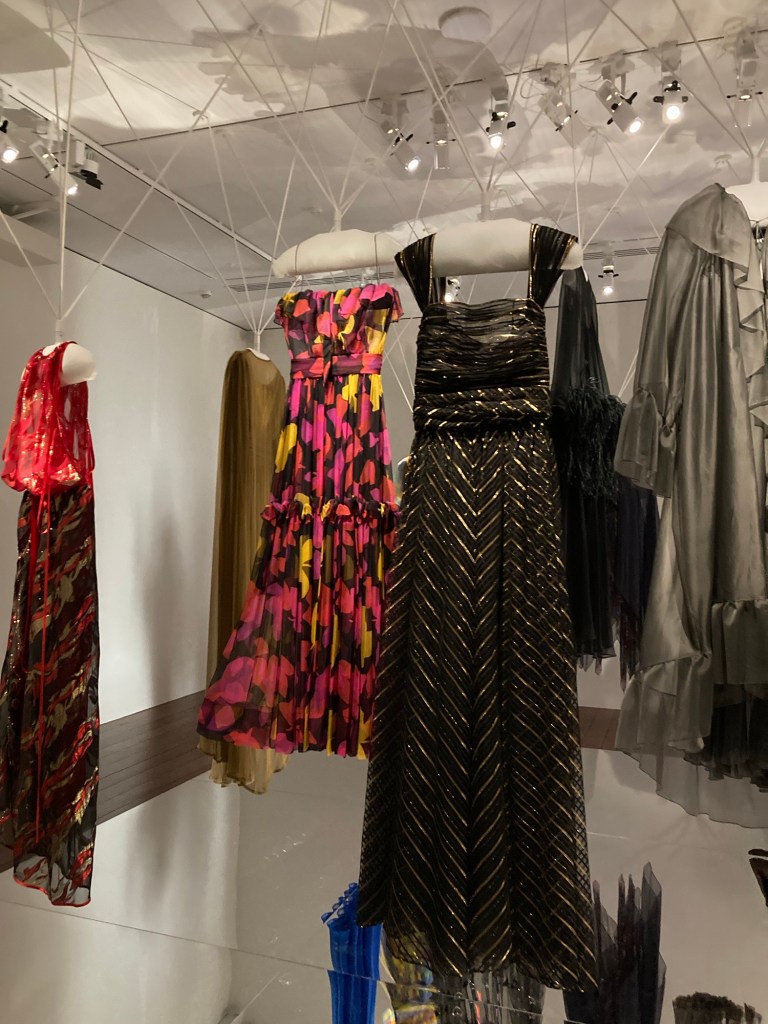
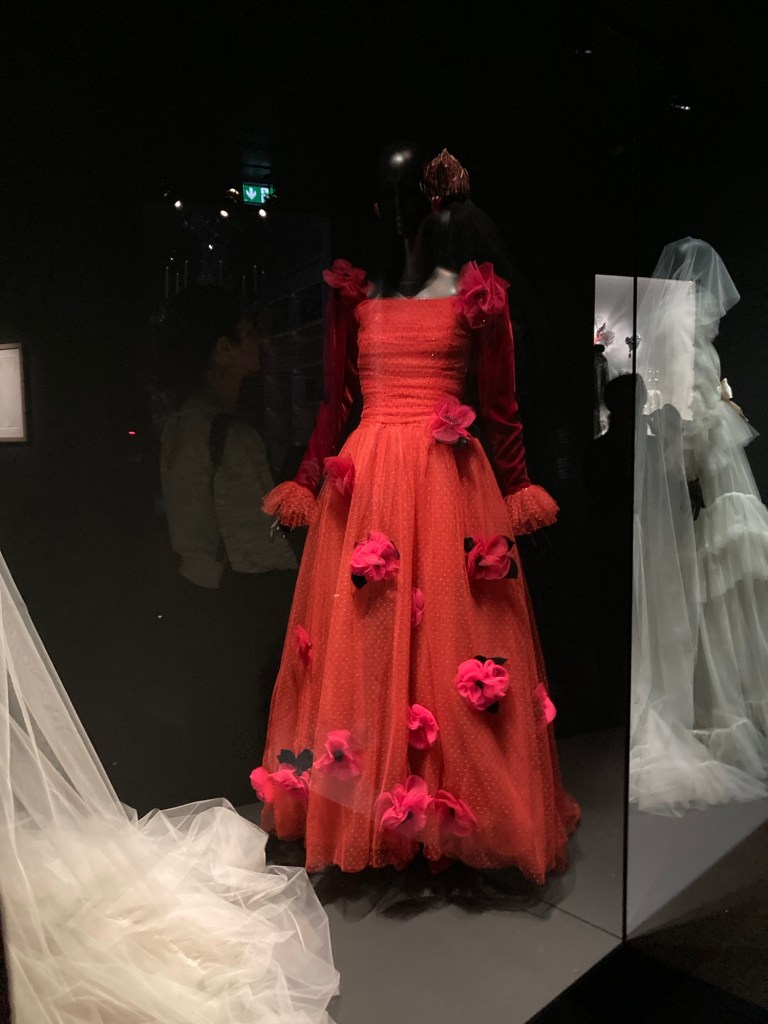
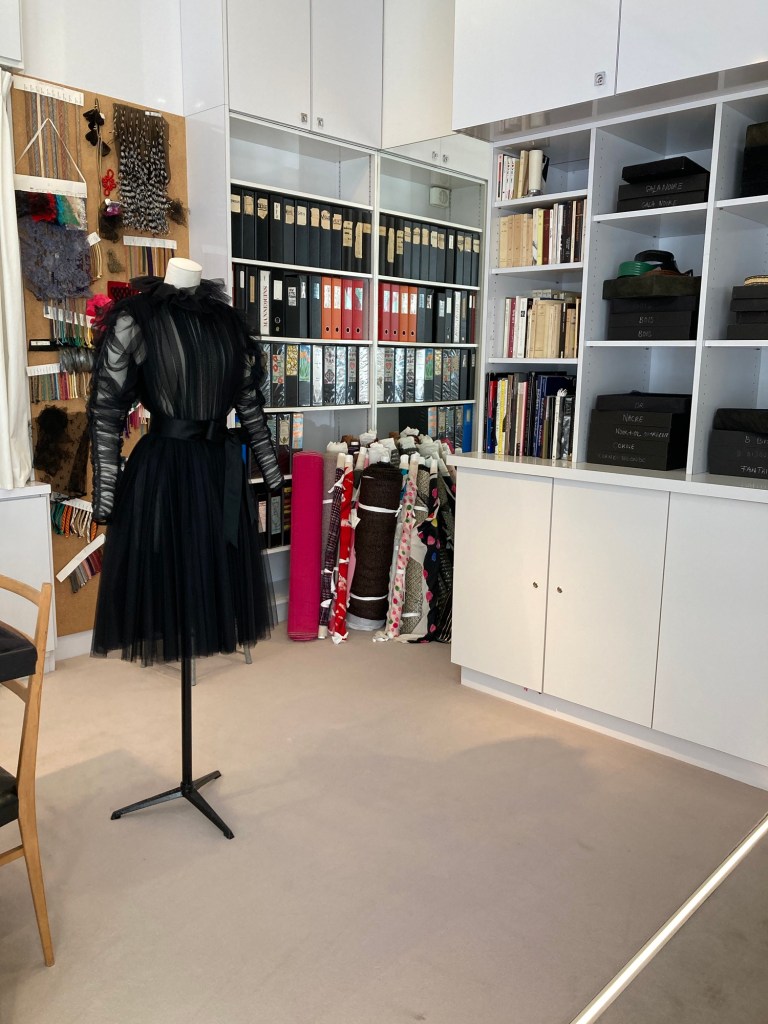
As luck would have it, the Dior museum was closed in Paris last week while a new exhibit was being staged there. So my friend and I decided to visit Musée Yves Saint Laurent instead. What an education. Here are some of the things we saw there:
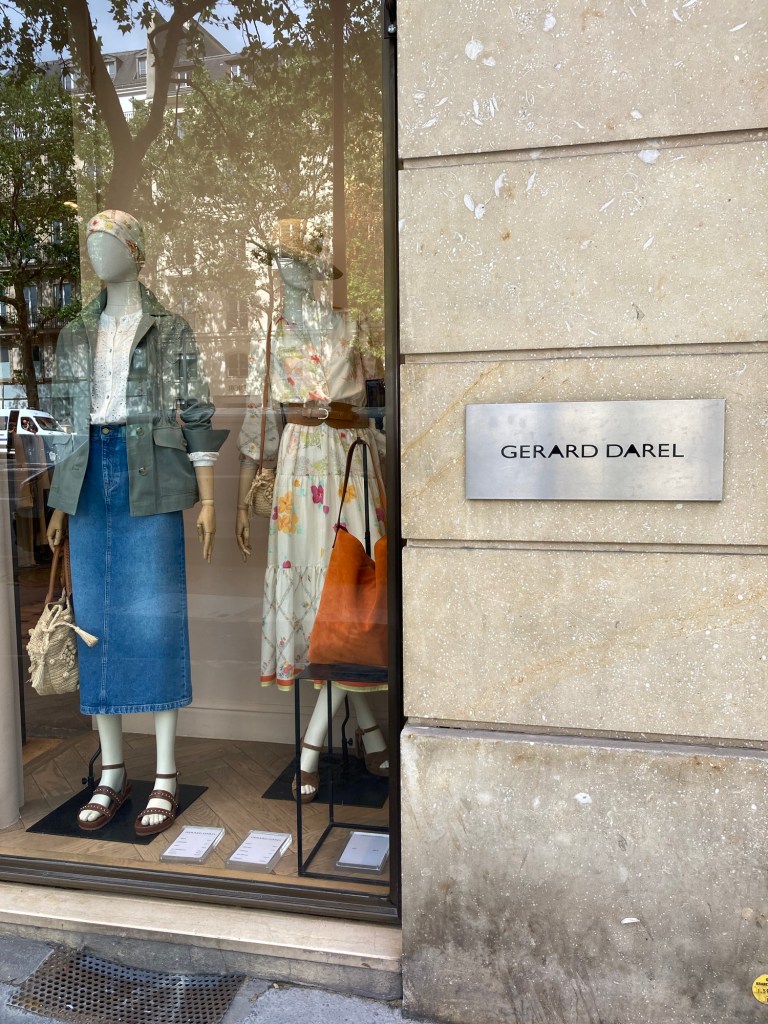
Our hotel was located in the Fashion District of the city so it was fun to see the window displays of Spring/Summer fashions:
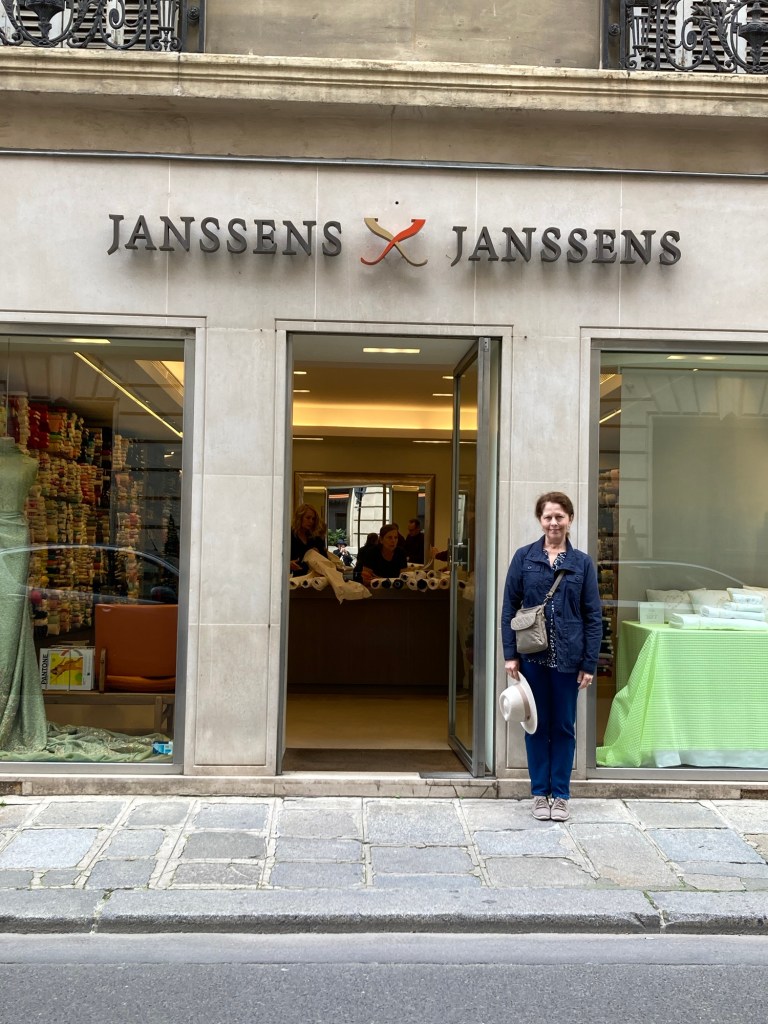
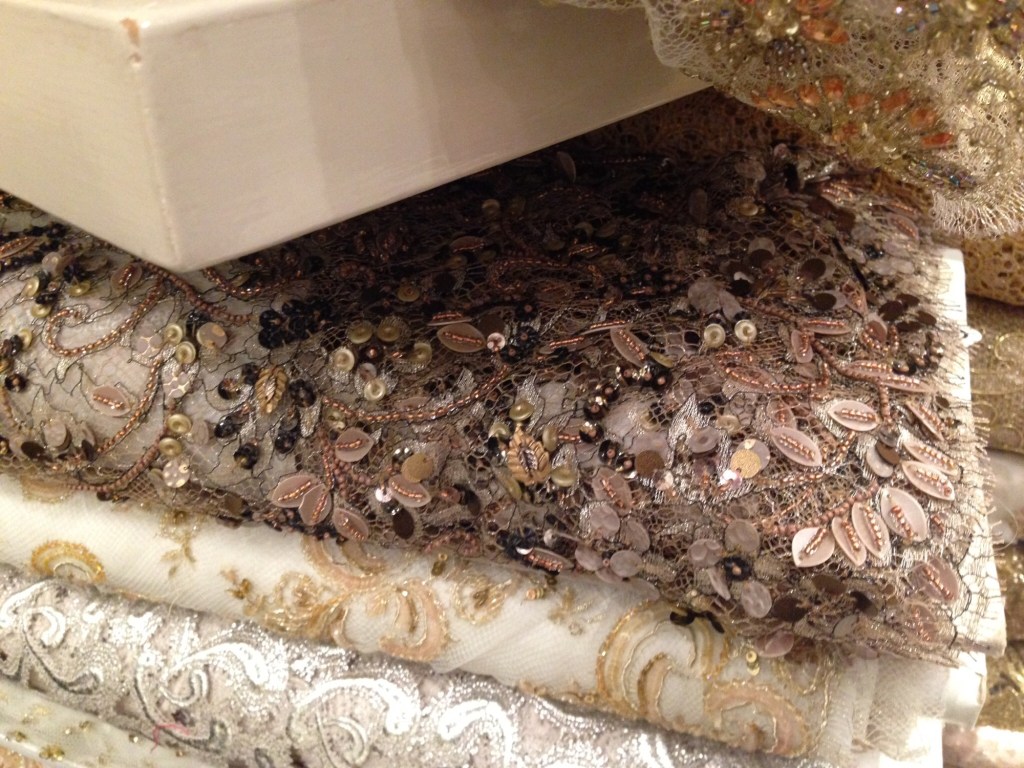
Of course, I had to hit some fabric stores as well so Janssens and Janssens on Rue d’Anjou was at the top of my list.
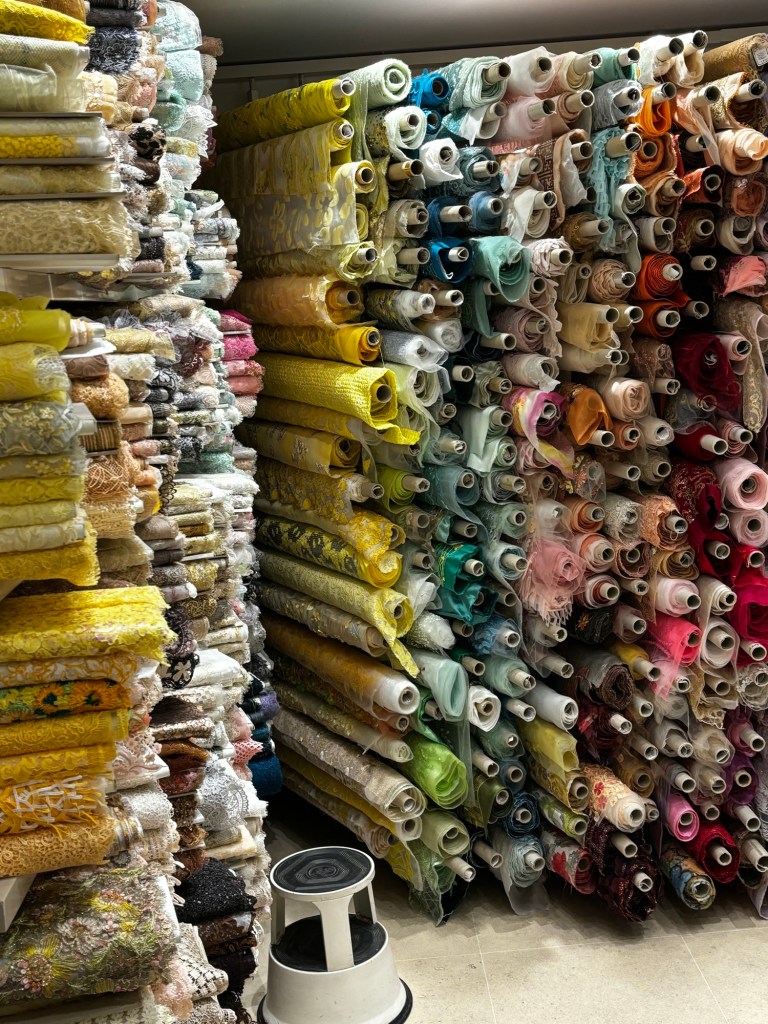
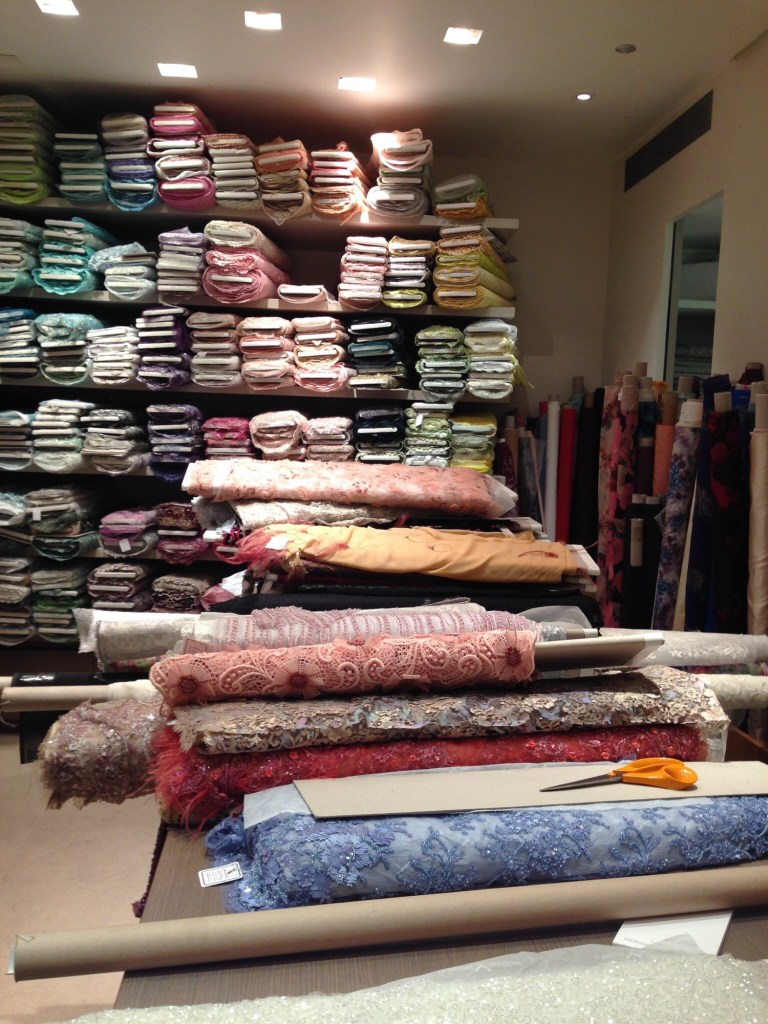
This is on the lower level where all the bridal and fancy gown fabrics can be found
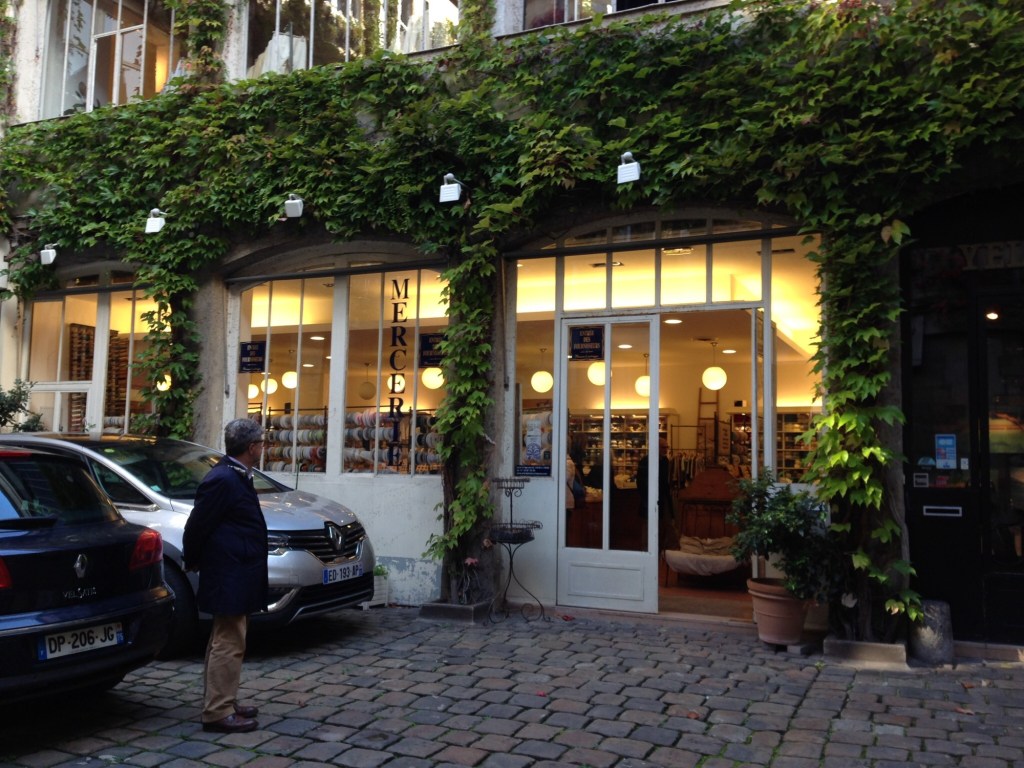
I also had to return to my favorite trim shop where the staff are super friendly and helpful. Even with my limited French, they were patient and kind.
Entree des Fournisseurs 8 rue des Francs-Bourgeois (Marais)
This week my friend and I are in enchanting Provence, East of Avignon. She’s participating in a Plein Air painting workshop
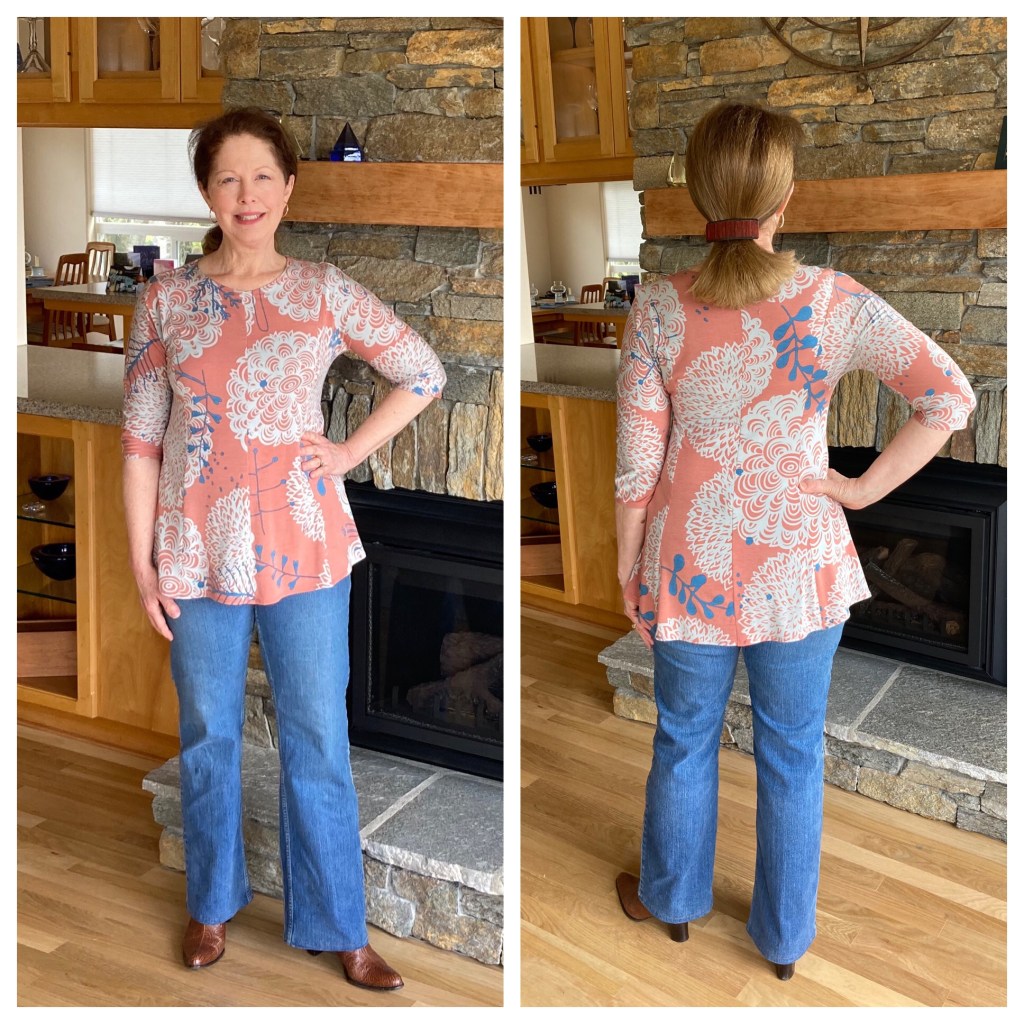
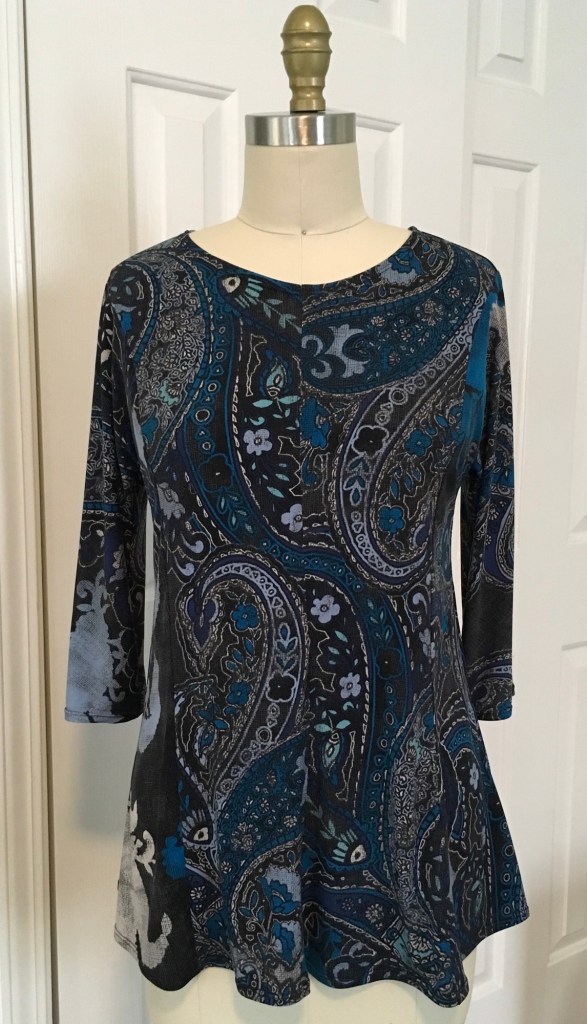
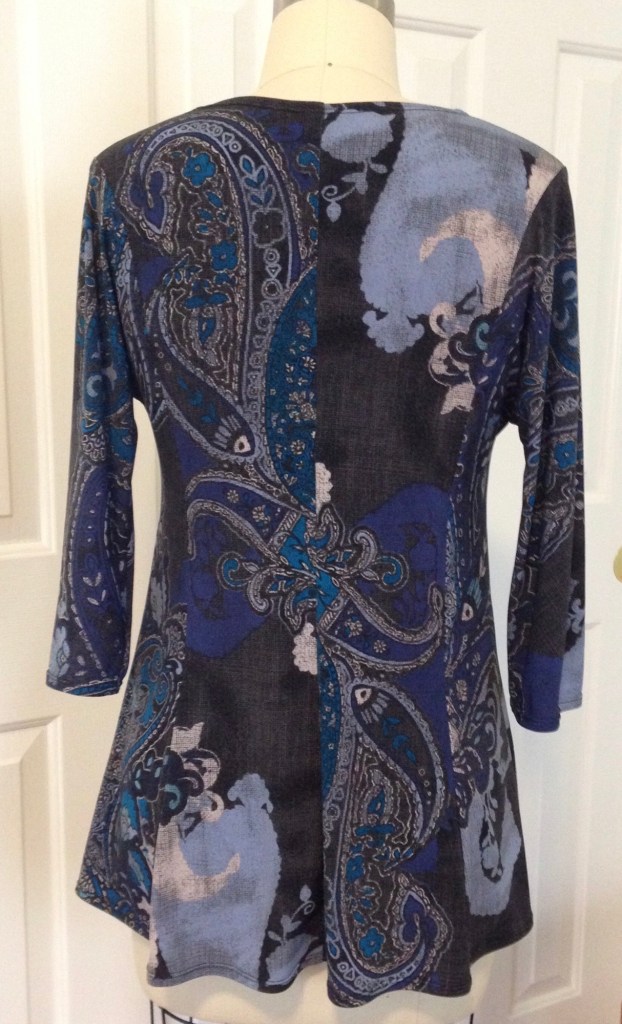
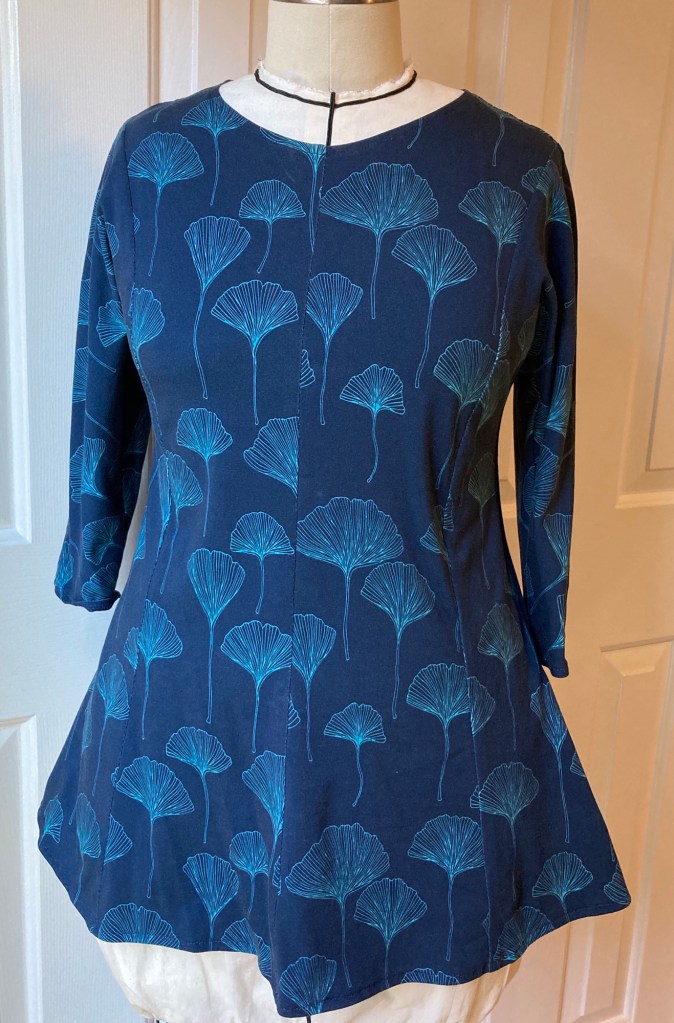
Behold my recent PatternReview 2024 Pantone Color of the Year contest entry:
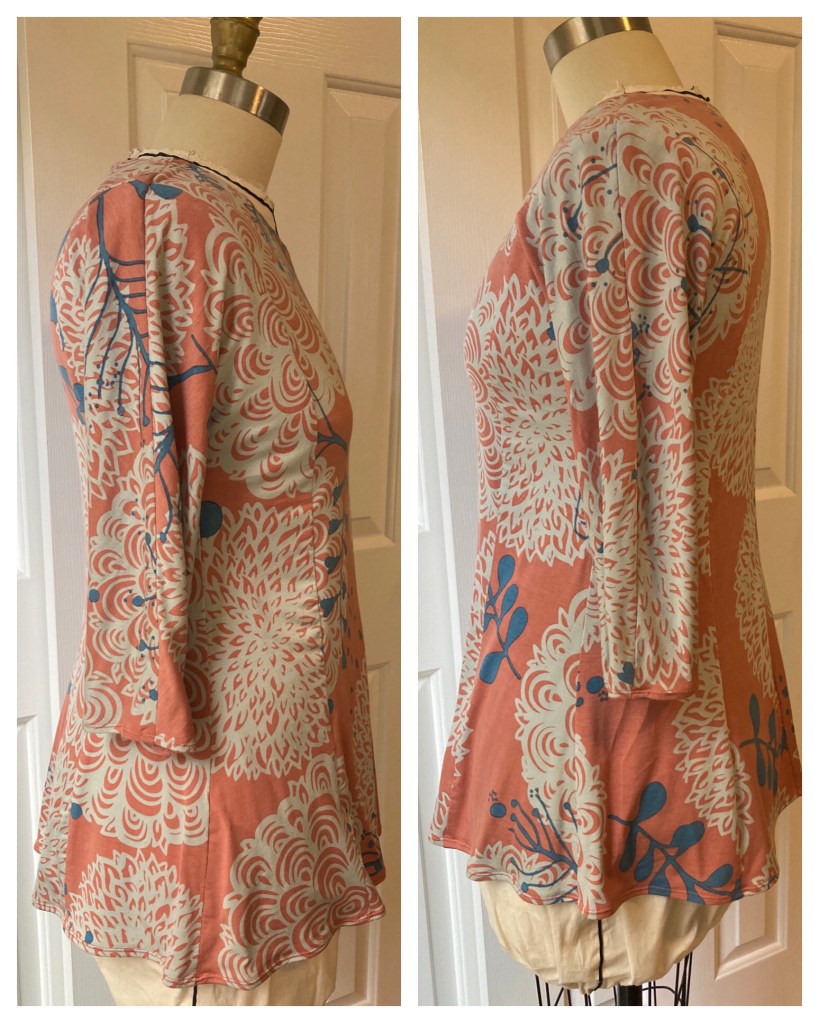
Front and Back “Giorgio’s Top” 312 by Silhouette Patterns The shoulder and sleeve seams often yield fun and unique twists and turns from the print you’re sewing with.
Here is an excerpt of my PatternReview contest entry notes:
When I saw the 2024 Pantone Color of the Year contest come up on Pattern Review I was inspired to make something from this peachy rayon knit print fabric from my stash. The solid peach background has just the right amount of pink and orange to compliment the complexion and seems to fit the Pantone “Peach Fuzz” description well, “ a “peach hue softly nestled between pink and orange.” It is “poetic and romantic, a clean peach tone with a vintage vibe” which “reflects the past yet has been refashioned with a contemporary ambiance.” The print pattern on the fabric also has a vintage feeling and a bit of a contemporary vibe which I like. The design challenge for me personally was how to use the larger scale print on my 5’3 frame without overwhelming me proportionally. Choosing “Giorgio’s Top” by Silhouette Patterns with its Princess Seams really helped break up the print a bit and the kimono sleeve shoulder seams yielded surprising twists and swirl effects as a result. I will definitely get a lot of use from this versatile and comfortable knit top for years to come. It seems to work well for both casual and dressier occasions and will pair well with other items in my wardrobe.
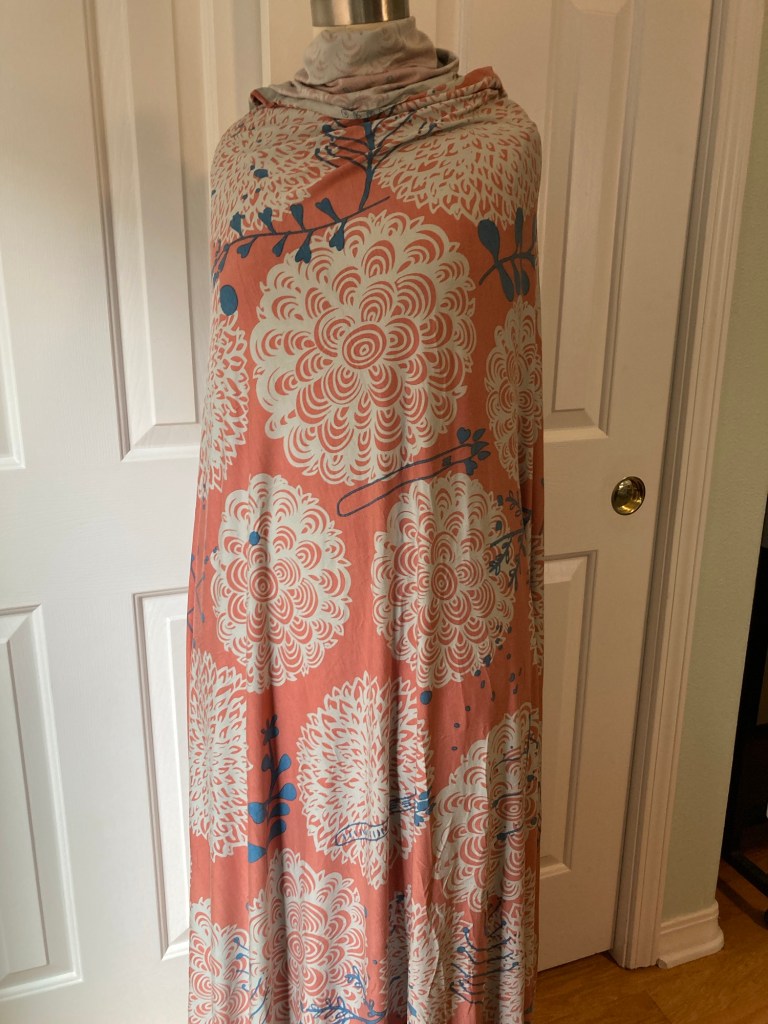
The original fabric. The scale of the chrysanthemum blooms measure approximately 10” in diameter.
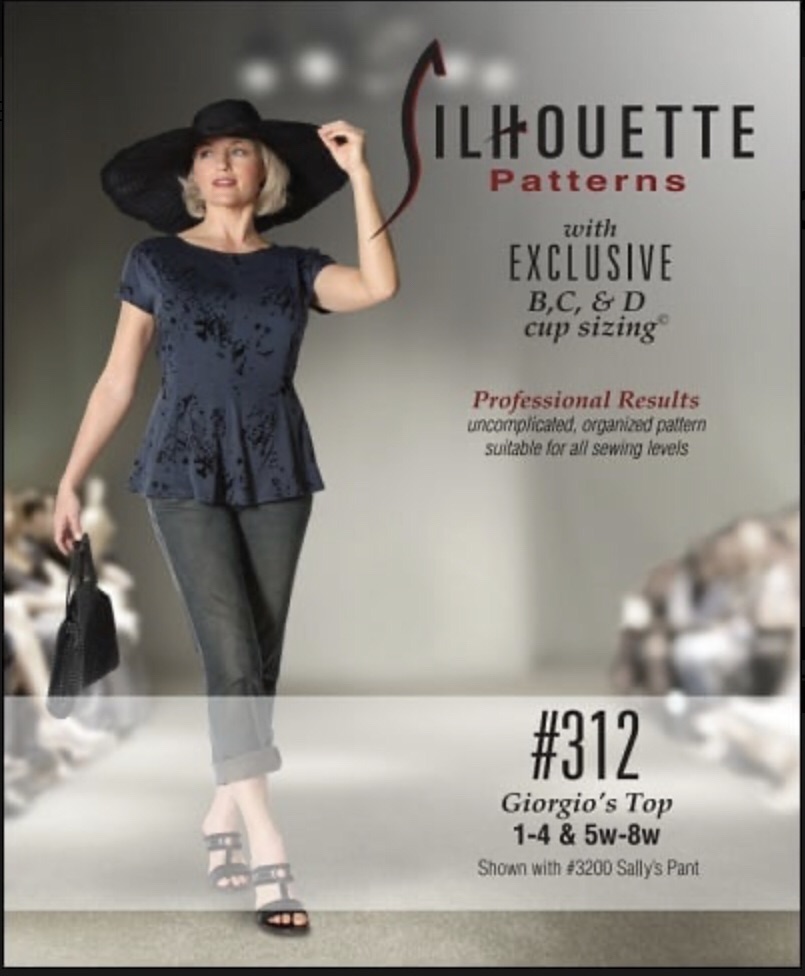
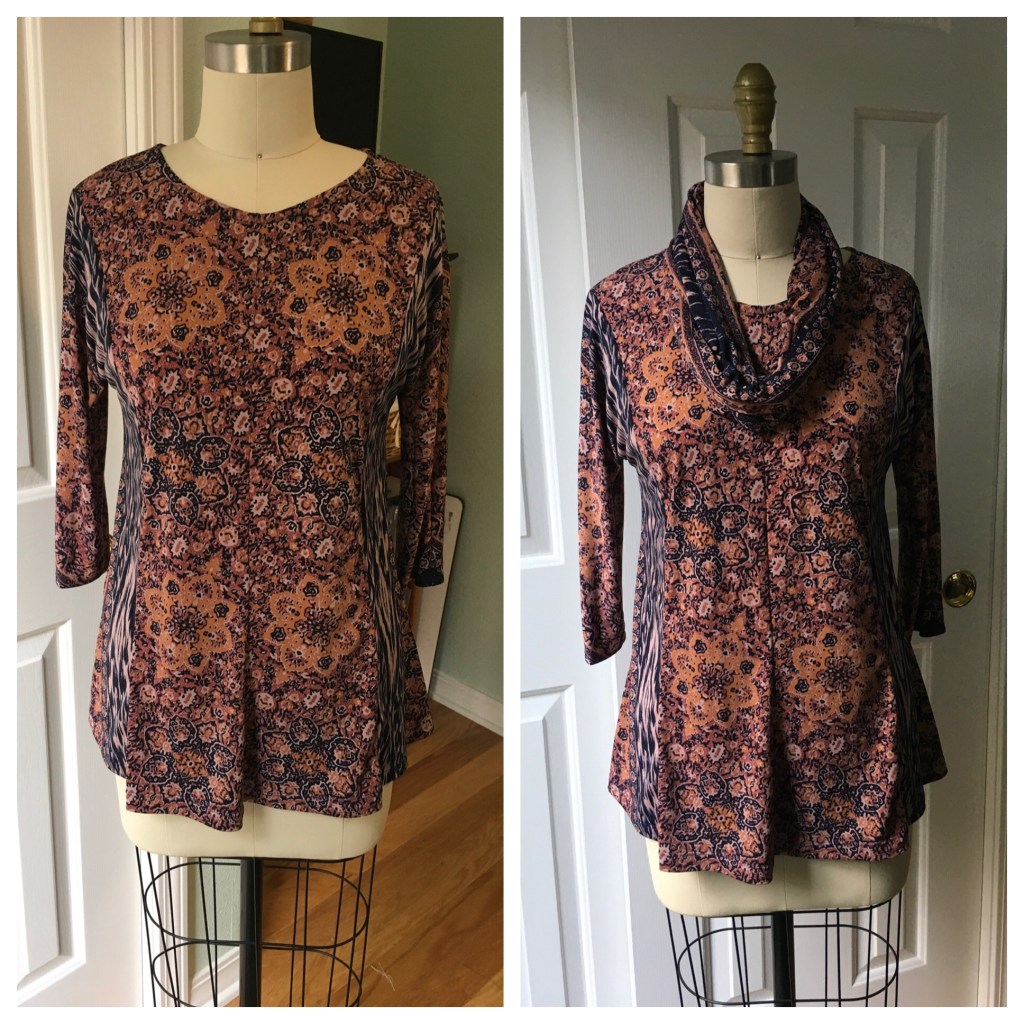
When I first saw the pattern envelope the model in the photo was wearing the short sleeve view which didn’t really appeal to me. Then I attended the Minneapolis Sewing Expo and the pattern maker, Peggy Sagers, was wearing an an alternative version featuring the 3/4 length view of this same pattern, much more attractive! It just goes to show that judging a pattern by the envelope photo alone can often be deceptive when it comes to how to most effectively make it your own. This is why I like pattern envelopes that feature more than one view.
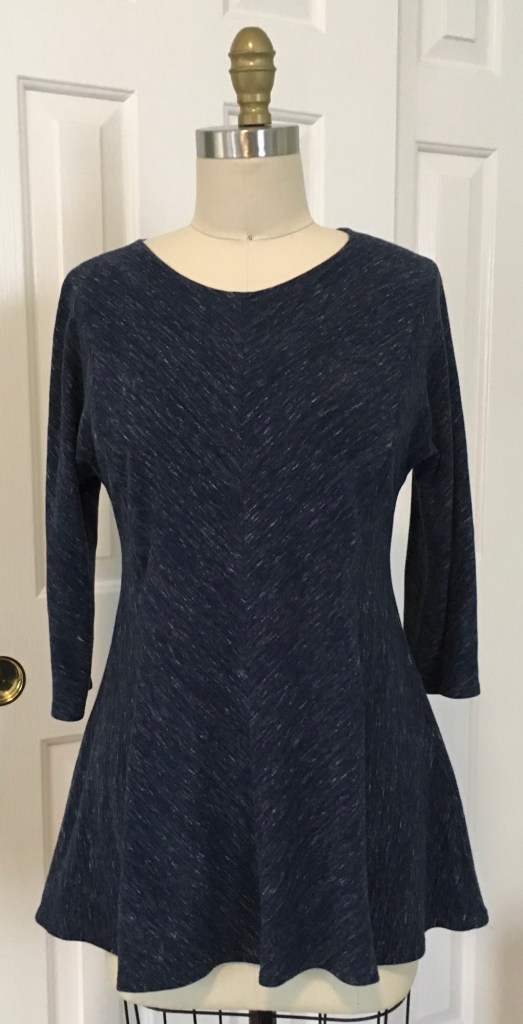
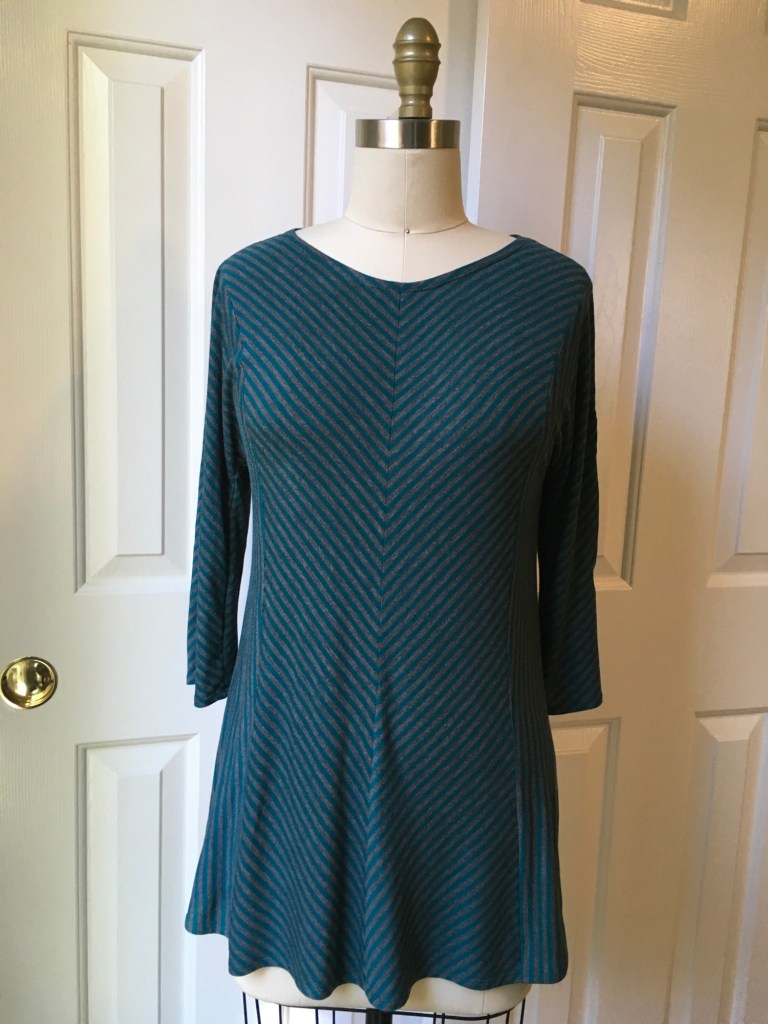
When composing today’s post I started to count the number of times I’ve made this particular pattern and I’m estimating it must be more than ten. Here are photos of some of them:
Note the design possibilities of having so many seams. Some planned, some fun surprises. A stripe-like print cut on the bias.I made this one for St. Patrick’s Day. Love how fun it is to make this top with stripes!Note the chevron effect on the sleeves! I chose to hand-baste the seams first for this über-stretchy modal fabric. Wore this one for my yoga class this morning!I posted this version a while back in connection with my capsule wardrobe challenge.
The above versions of this pattern are some of my favorites and I wear them often. I’ve also discovered that this top design works well for my yoga classes too. Very comfortable and flexible for most any position called for.
In conclusion, the benefit of having a “TNT” (tried ‘n true) pattern such as “Giorgio’s Top” is that it is a quick make and a joy to sew. With the right fabric choice, (4-way stretch knits) I’m confident it will most likely turn out well every time.
Last month I was in full Christmas present sewing construction mode (making three men’s shirts) when, upon entering my sewing space, I encountered the following on the floor:
What? Again?!
While it’s true that I’ve made this particular shirt pattern more than 20 times, there are still moments when I’ve found it helpful to review certain construction steps along the way, especially if it’s been a while since I used it. Of course I could most likely have winged it and completed the shirts with relative ease, but seeing the missing part of the instructions was a tad annoying. Then I went upstairs and found the canine pattern guide muncher:
No, I’m not a puppy, I just turned 12.
When I saw that defiant, smug expression I had to laugh.
The pattern I was using was Janet Pray’s Classic Sport Shirt which is unfortunately now out of print.
I love this pattern and have made it many times
I decided to reach out to the pattern maker, Janet Pray at Islander Sewing:
and included details and photos of my little saga. Janet wrote back and said my story and photos made her laugh harder than she had in weeks.
As it happened, even though the Classic Sport Shirt pattern is now out of print, Janet still had copies of the pattern guide and graciously sent me a replacement. She also took a photo of the sewing guide page I had with the missing center section and sent it to me to help tide me over before the replacement guide arrived. Talk about generous and kind! This is one of the things I like about independent pattern companies, personal connections and great communication.
I’m happy to report that with Janet’s help, I was able to finish all three shirts I was making in time for Christmas.
Here is one of them in Forest Green:
I’m still not sure how our sneaky cocker spaniel finagled that folded pattern guide off my cutting table. Given previous pattern tissue mishaps, I’m usually pretty careful about not leaving pattern pieces, sewing guides, (or anything paper-related for that matter) within her destructive scope. I guess this latest caper will remain a mystery for the time being. 🙂
The last time I posted, not much sewing was going on. Thankfully, I’m happy to report that a lot has changed since then.
After all of our remodeling projects were completed last Spring,
New fireplace and hardwood floors
including (among several other projects) clearing and repainting our master closet space, my husband and I made a concerted effort to pull out clothes and shoes to be donated prior to moving everything back. We also participated in a neighborhood garage sale around that same time which provided a perfect opportunity to clear out even more items including a big bag of patterns I intended to sell on eBay but had never gotten around to doing. A wonderful sister-sewist took the whole lot off my hands in one fell swoop. Not to worry, I still have quite a large inventory remaining in my pattern stash. (See my previous post 🙂)
What a joy it was to finally set up my sewing space again at long last, but oddly, I found myself feeling a bit paralyzed about what to make next. There were a couple of semi-completed projects in the queue but no motivation to finish them. Maybe it was because those were winter related items and here it was well into Spring and coming in fast on summer with warmer weather with the promise of new breezy dresses and lighter pants and tops to contemplate making.
My summer dress muslins were completed but I knew I also wanted to make some linen blouses with embroidered embellishments. So I got out my tried-and-true Silhouette Patterns #600 “Classic Blouse” pattern:
which shouldn’t have presented any worries…but, not only were the original tissue pattern pieces pretty mangled, my traced and altered go-to pattern pieces were pretty marked up as well. You might be thinking, why not just trace out a clean version of the altered pattern? Well, not so fast; something was clearly holding me back.
After giving my hesitation some thought, I realized that even though I’d gotten my altered version to a point where it fit me reasonably well, there were still elements I wasn’t happy with, such as the location of and drape of the shoulder seams and sleeves. Even with a 3/8” shoulder slope adjustment, petite length adjustments between the neck and bust apex, and torso length, the drape of the blouse back hem tended to tilt out a bit from the hem. I also wasn’t happy with how the sleeve draped from my shoulder. Maybe it was time to make another muslin before steaming full speed ahead.
Around this same time I saw an advertisement for the GHF Couture masterclass, which covers creating a custom bodice block from one’s specific measurement then learning about the variety of dart manipulation and design choices. I decided to check it out and found the course to be highly useful and informative.
I’ve always liked the concept of having well-fitting blocks (bodice, skirt, pant, jacket) from which to adapt different design elements. In fact, that was my original motivation for developing my “Classic Blouse” block as my go-to pattern and guide for creating several different tops such as tunics, dresses etc..
Since my previous blouse block still had issues, I decided to start afresh, using my current measurements and do a flat pattern bodice block comparison between three different pattern companies. “Design, Cut & Wear Professional”
The bodice block pattern includes long shoulder and waist darts (this one I used for the GHF couture master class) Vogue 1004 (which includes side and waist darts) and “The Dress Kit” Bodice & Skirt blocks from Sure-Fit Designs also with side and waist darts).
Each option yielded new and useful positive fitting results, updated measurement information and fine-tuning.
With both the GHF Masterclass and SureFit Design methods, I managed to create reasonably well fitting bodice blocks, each with helpful reference information to go with moving forward. Vogue 1004 yielded similar results to other Vogue blouse patterns in my stash.
Perhaps most useful and one of my main “ah-ha moment” takeaways from the first two blocks I developed was the expressed importance of really nailing the bust apex location, not only the shoulder to apex, apex to waist and shoulder to waist length measurements, but also the apex to apex width measurement which ultimately affects the location of vertical darts as well.
It seems so obvious to me now, but even after decades of sewing experience, most of us home sewers spend countless hours trying to adapt our commercial patterns to fit whatever the pattern designer’s fit model’s proportions were for that particular pattern, including the height and width location of the darts. Turns out it’s not enough to simply size up or size down in pattern sizes to address circumference and length differences as the location of the bust apex width from center front will not necessarily be lined up correctly. When the apex width measurement isn’t accurate to begin with, the steps to alter, re-drape and fine-tune the fit tend to be much more labor-intensive as a result. Same holds true for just relying on one’s bust circumference measurements to determine pattern size selection.
Another revelation from my recent block comparison effort was something Glenda Sparling of Sure-Fit designs shared in one of her helpful YouTube tutorials regarding the order of shoulder adjustments; first, determine the correct shoulder seam width, then adjust for shoulder slope, followed by a forward shoulder seam location. I also found some excellent tutorials on YouTube from both Sure-Fit designs and JStern Designs about how to adjust the sleeve cap for these types of shoulder adjustments as well. Now I had a workable strategy for that well-draping sleeve I’d been looking for.
Regarding my forward shoulder adjustment; in my case, the back draping issues I’d experienced with my “Classic Blouse” muslin iterations (the CB hem tended to tilt out a bit at the hem which I’d first attempted to remedy by adding more length at the bottom) were not in fact caused by a rounded upper back as I’d originally thought, but rather, in my case, I needed to add 1/2” to my outer back shoulder seam tapering to nothing at the neckline and taking away the same amount from my front shoulder line. (my clue? the back neckline was sitting where it belonged on my neck and not pulling down and back). Previously I’d been taking away an equal amount (3/8-1/2”) from both the front and back outer shoulder seams which seemed to address excessive length in the front but wasn’t quite right in the back. Obviously the front and back pieces weren’t balanced on my body so simply adjusting for a shoulder slope adjustment equally wasn’t the ultimate solution.
So with all this fresh information and utilizing some newly-hewn proportional guidelines, (darts and shoulders) I literally went back to the drawing board and made another muslin of the “Classic Blouse” and guess what? Even though the length and circumferences of my previous attempts were similar, this latest muslin fit much better. I’m happy I spent the time developing something I will use with confidence Even though it slowed down my garment making productivity, it doesn’t feel like a waste of time in the least. I also look forward to sharing one of my new creations using my new and improved blouse (bodice block) in a future post.
In conclusion, it’s probably a good idea to make new pattern blocks every few years to address where our bodies are at that point.
****January 2024
My how time flies!
How did I do with my 2023 resolve not to buy any new patterns? Well, aside from the bodice block patterns, I believe I did fairly well for the first six months. I ultimately ended up with a list of ten or more patterns on my wish list and then found a couple of out of print patterns that really caught my eye on Etsy and Ebay. Knowing these would most likely not be available later, I decided to invest in those in short order. Of course, a couple of hard to pass up sales also came up last Fall so I ultimately decided to purchase a few patterns I knew were different and unique to those already my collection.
I still have my pattern wish list which continues to prove useful in the practice of waiting and reassessing what inspires me and what I’ll actually make.
I’ve also been using the patterns I already have in the last six months and this more conservative approach has yielded more intentional sewing across the board. More on these projects to come in future posts.
May this new year find all “makers” in our world full of inspiration, joy and creativity as we move forward in our craft.
Greetings from the (relatively) chilly Central Coast of California this week. I say chilly with somewhat of a smile of my face after living in Minnesota for twenty two years of my adult life. That’s a cold place in Winter for sure! This said, it was a bit strange to learn that while temperatures were 34 degrees Fahrenheit here just 15 miles away from us a few days ago, temps in Minnesota were hovering in the mid 40s F that same day.
As the title of this blog entry suggests, we’re presently in the midst of a moderately extensive home remodel at the moment including hardwood flooring installation happening on the upper story of our home as I compose this post.
We also don’t have our furnace turned on due to the hardwood sanding action upstairs. It’s currently averaging around 52-57F inside. Thank you Honeywell space heater!
Then I give myself a reality check. These are relatively minor inconveniences when compared with the extreme cold weather, war, earthquake devastation and resulting ongoing heartbreak and hardship currently experienced in such places as Ukraine, Turkey and Syria at present. Contemplating the contrasting situations, it does give one greater perspective. So it’s a little chilly, things are somewhat crowded, we have to put some creative projects on hold and we have to improvise when it comes to preparing meals, we, nonetheless, have much to be grateful for.
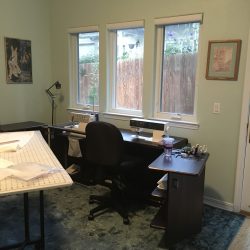
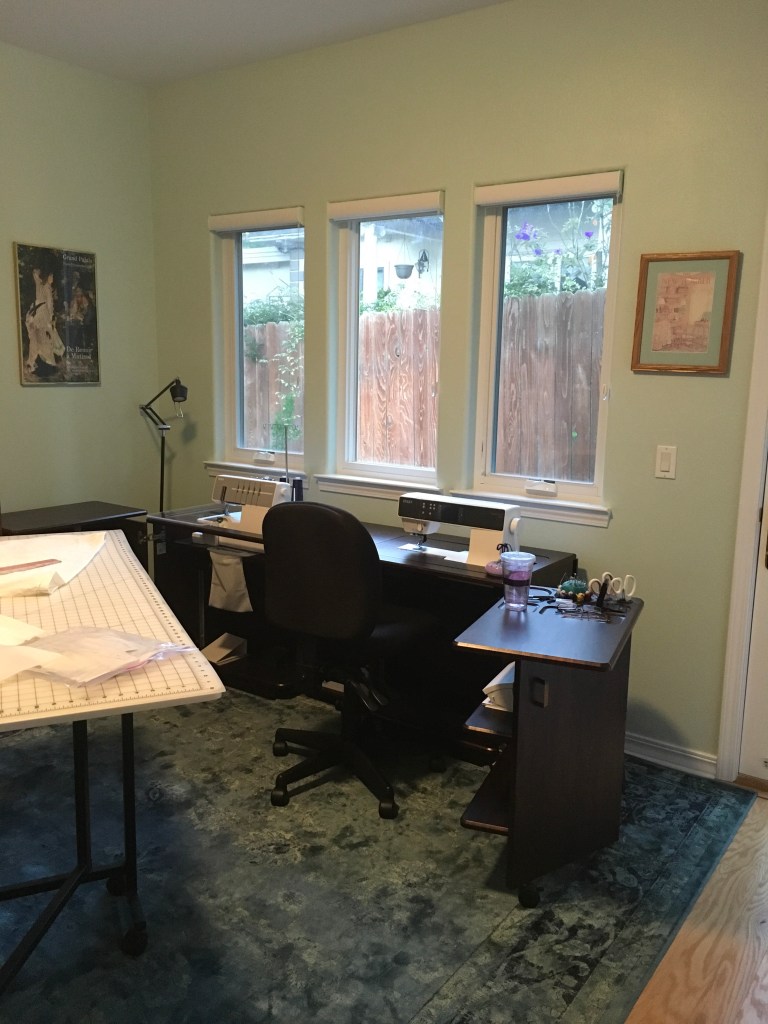
My wonderful sewing room currently functions as our sleeping quarters this month, so unfortunately, aside from some hand-mending, not much sewing is going on as of late. I mentioned in a previous blog entry that this particular space has convertible functionalities both as my sewing studio and as a guest room.
In guest room setup.
As I shared before, to make my sewing space less crowed, we invested in a wonderful queen size wall bed (check out https://www.wallbedsbywilding.com/ ) for this room which is amazingly sturdy. Now that my husband and I have the opportunity to try it out for ourselves, we can also attest that it is surprisingly comfortable as well. We’ve always wondered if our respective houseguests were graciously being polite when they reported to have slept well during their stay, now we have first hand knowledge that it’s not bad! In fact, it’s better than many hotels beds we’ve slept on.
When we moved here in 2016, I took extra care to organize all my sewing supplies, machines, fabric, etc., seeing to it that everything had a specific designated place where each belongs during the guest room setup. So far this strategy continues to work well and the conversion process from one function to the other can be effectively achieved in approximately 2-3 hours including vacuuming and cleaning.
Here is a refresher photo of my sewing room in the sewing room configuration:
The “dual mate” Koala sewing cabinet (not sure if it’s made any longer) also has a fold-out drop leaf surface that I use when quilting.
Assuredly, our current home renovation construction mess, living displacement and minor inconveniences are temporary and I look forward to writing another update when my sewing and quilting activities are up and running again.
In the meantime may we all remain safe, warm and well.
Late last September, my sewing friend, Tina and I met up again, this time in the San Fransico Bay Area for a five-day pattern fitting and fabric shopping adventure.
After much research about where to stay, we finally booked a charming little two bedroom houseboat in Sausalito. It was comfortable and cozy and yet we still had room to set up an ironing board, sewing machine and tri-folding full-length mirrors for our pattern-fitting needs.
Is it a surfboard or an ironing board?
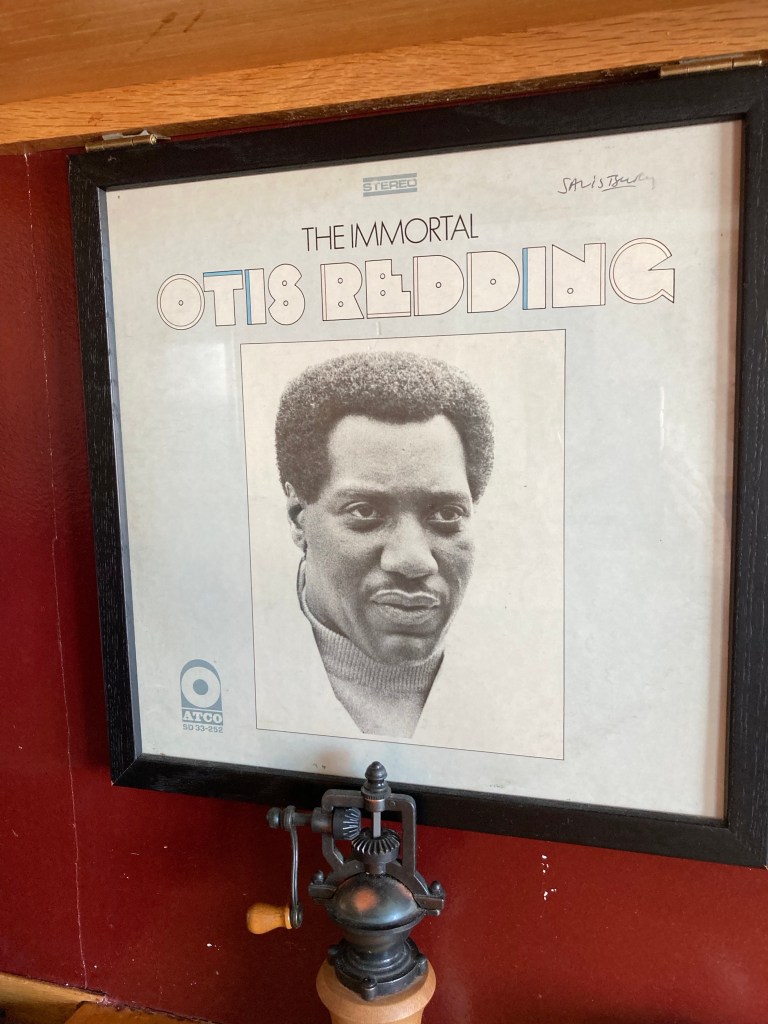
This is the same area where Otis Redding wrote his famous song, “Sittin’ by the Dock of the Bay”.
Our main pattern-fitting focus on this particular trip was to experiment with Ruth Collins’ “Top Down Center Out” pants pattern fitting method which we read about in Threads magazine’s Summer 2022 issue. We also watched numerous YouTube tutorials on the subject before we came, with the most helpful being those produced by The Crooked Hem and JSterns designs.
While we are both petite women, Tina and I are blessed with different body shapes, each with our own unique fitting challenges. With over 100 years of sewing experience collectively and after trying practically every pants pattern fitting method available up to this point, often with varying and frustrating results, we were curious about Ruth Collins’ TDCO philosophy.
We arrived on the scene with multiple pre-assembled pant “toiles” (muslins) to fit on each other and I’m happy to report that we came away with largely satisfying and successful results. We also learned a lot in the process. My personal takeaway from our first experimental attempts was that while length and circumference measurements are all well and good, each body and hip shape also affect how the overall pant drapes flatteringly. Making the waistband first and adding 3” more to the top of the pant body gave us lots of room for adjustment, not only for the center front and center back lengths and drape but also the sides. Our final assessment from our initial experimentation is that the TDCO fitting process seems much faster, yields more satisfying and immediate results and is ultimately less fussy and time-consuming where pattern alterations are concerned.
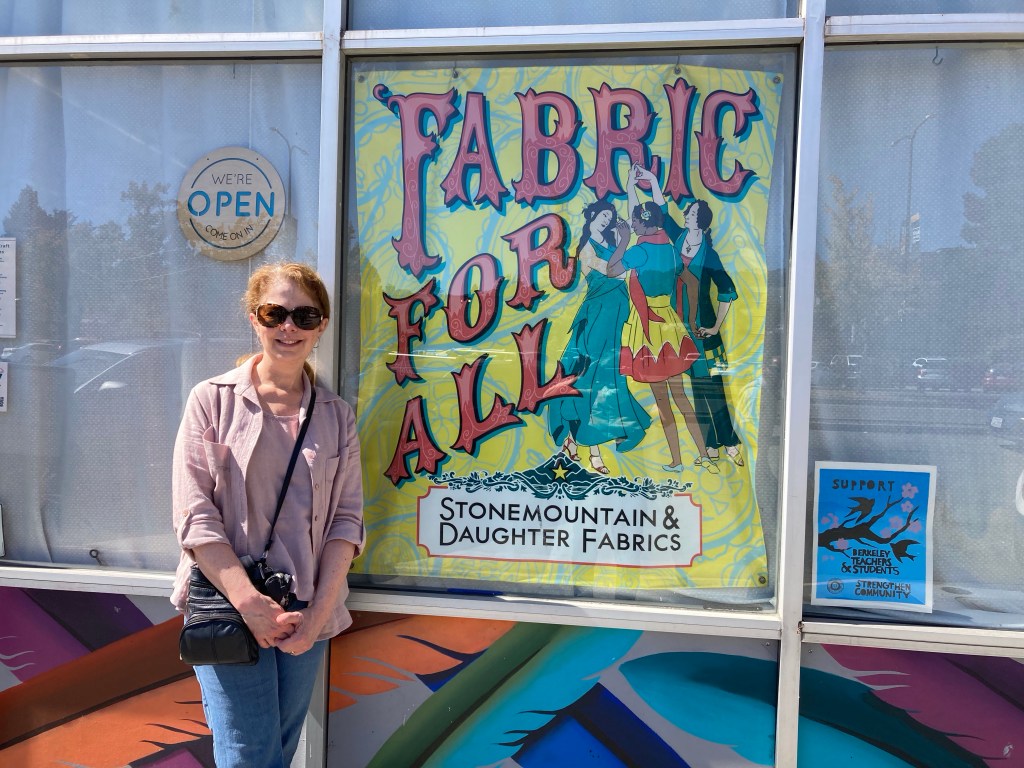
As for fabric shopping, we knew we wanted to visit Britex in San Francisco one day and StoneMountain and Daughter in nearby Berkeley on another.
On our first full day we took the Sausalito ferry over to San Francisco where we visited the amazing Britex fabric fantasyland near Union Square. I scored a beautiful silk chiffon print, some Italian denim blue leather (for a jacket) and a piece of beautiful French cotton shirting that day. “Douglas” was our man and his 30+ plus years of experience with all things Britex did not disappoint.
Heading over to S.F. across the bay.San Francisco Ferry Terminal Britex! Just outside Britex (photo curiosity of Tina)Britex lower level. The upper level has even more amazing fabric as well.
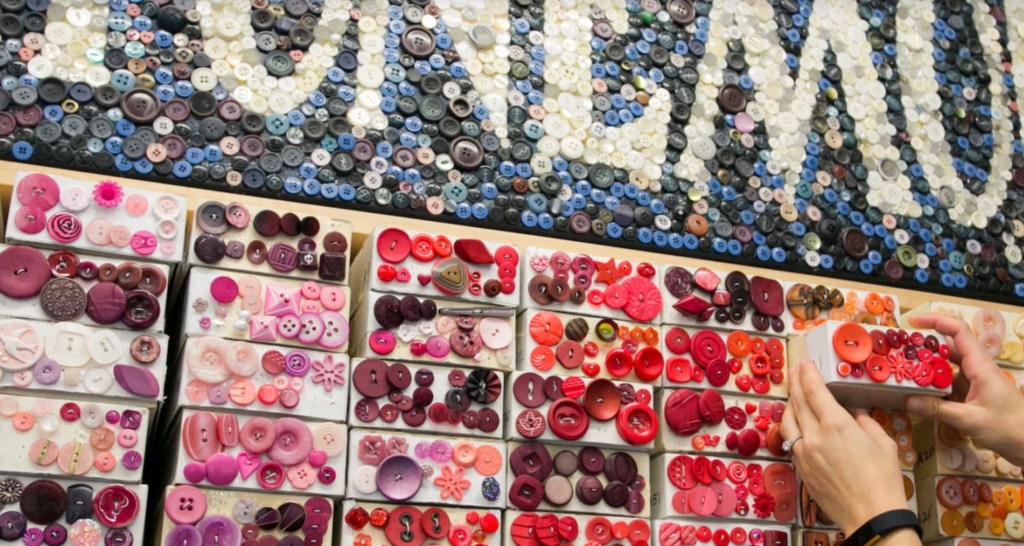
StoneMountain and Daughter Fabric in Berkeley was our destination on day three and it also did not disappoint. We found a huge selection of fabrics there from Japanese indigo, silks, knits, gorgeous cottons of every weight among so many others. Upstairs was the bargain floor with many more treasures to explore. I found some beautiful and unique buttons, an exquisitely soft piece of dusty rose French Terry and a few other high quality solid cotton basics for my stash.
StoneMountain and Daughter in Berkeley, CAThe amazing button wall at StoneMountain. (Photo from their website)
Lastly, as a bittersweet post script to my blog entry about Tina’s and my pattern fitting trip to Santa Cruz and Hart’s Fabrics earlier in 2022, I’m sad to report the beautiful wharf, boardwalk and colorful bungalow hotel where we stayed in nearby Capitola sustained significant damage due to the severe and record-breaking storms we’ve experienced here in California in the last couple of months. Hopefully those iconic parts of that charming little seaside town will be able to build back better and stronger when all is said and done, but without a doubt, that particular trip will remain even more special for my friend and I given the community will never be quite as it was when we were last there.