
I’ve been wanting to try my hand at machine embroidering on jeans for some time now. Katrina Walker’s Craftsy class, “Machine embroidery on denim” had been sitting on my wish list queue for quite a while. I finally took the plunge and invested in the online class, watching each of the sessions all the way through. Ms. Walker’s teaching style is clear, practical and inspiring. She demonstrated how to achieve the best results with machine embroidery on both woven and stretch denim, using specific designs, choosing stabilizers and planning out design layouts using grain lines and position reference points. A recent addition to my machine embroidery practice includes printing out a design chart which is a useful visual aid when planning sizing and layout of my designs on clothing, dish towels etc., as many possibilities as one’s imagination may allow.
Earlier today I pulled out a pair of stretch denim jeans, measured where I wanted my design path to start and set about picking out the inseam of one of the legs. Fortunately this pair didn’t have top stitching on the inseam so the reassembly should be pretty simple.

 My next step was to draw my chalk grain lines and cross hair markings, lay out my design and plan out my placement on the jean leg.
 Thread choice was a bit tricky since this was a spontaneous effort. I decided to “audition” some poly thread spools I had on hand.
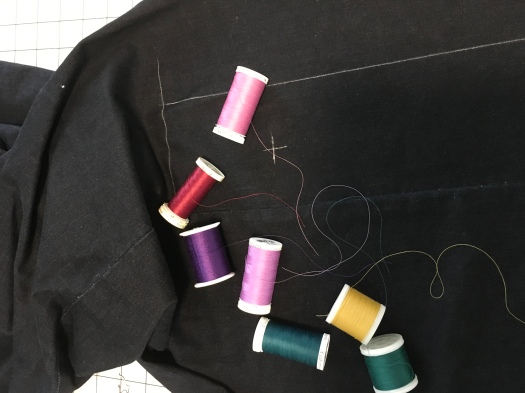
Once my thread colors were chosen, I positioned my stabilizer in place (I used one layer of Pellon water-soluble sticky stabilizer then laid in a layer of sturdy cut-away) and into the hoop everything went. I also changed my needle to a size 16 denim needle.

After fine-tuning my precise-positioning tool it was time for stitch-out at long last.
As you can see from the videos, everything was going well with the first step of the design. The only real issue I had was with the dusty pink-colored thread which was of a lesser quality and from some of the older (20+ years) thread I had on hand. But I took a risk because I liked the color. The dusty pink thread broke more often than I care to admit, reminding me that you get what you pay for when it comes to all things related to machine embroidery. There was also a brief bit of bobbin drama during the dusty pink thread stage of the stitch out….okay already, no more cheap old thread!
Once the first design was completed, I reversed it to a mirror image on my machine screen then re-hooped, drew a new chalk cross hair, then stitched out the second design, connecting it with the first. ***What I will do differently next time= cut an extra long piece of stabilizer so I won’t have to double up on layers of stabilizer when re-hooping.***
Here is my finished first attempt, all ready for the inseam to be re-sewn and the hem top-stitched (I will change the color of the hem thread so as not to clash with the new embroidery design though).

All in all, I’m happy with my first attempt and will actually wear these jeans sometime soon.

Appears lush and perfect from here. Beautiful result, and looks like fun (except for the seam ripper duty).
When I first started reading this post I thought, “Oh, what a great way to use up my box full of old thread quickly!” But not so fast, eh?
(hate bobbin drama)
(love the sound of the machine in your video)
LikeLike